

|
|
|
|
 |
|
 |
BMW Garage | BMW Meets | Register | Today's Posts | Search |
 |

|
BMW 3-Series (E90 E92) Forum
>
Quaife LSD Install
|
 |
| 07-20-2010, 03:33 PM | #1 |
|
Lieutenant Colonel
 
163
Rep 1,588
Posts |
Quaife LSD Install
Before I get started, let me get some of the formalities out of the way. I have a 2009 335 6MT. I had a welded factory differential. As a result, I had to purchase a full, complete final drive from HP Autowerks.
Harold was a total joy to work with. I ordered the Quaife on July 8. I was told that it could take as long as seven days for HP Autowerks to ship the diff to me. In fact, the diff shipped out on July 14, six days after I placed my order. I received the diff a day later. I got the LSD installed yesterday. The install took one hour and 40 minutes. Euro Auto Spot did the work. Shane Nguyen, owner of Euro Auto Spot, and Steve, new master tech that was recently hired by Euro Auto Spot (he was most recently at BMW South County), tagged teamed the install. I watched the install and took pictures along the way. I was surprised how much work was involved in the install -- despite the fact that I bought the complete final drive (pumpkin with Quaife inside). I drove straight home after the install but one thing was obvious from the start. The car, when you accelerate, feels more sure now. It's very obvious. I didn't have a chance to hit any fun on- or off-ramps, but I'm looking forward to it. It's too bad the LSD isn't a factory option -- or standard equipment -- on the 335. This car could have really benefited from it. Oh, well. I have one now. I already think the money was well spent but I am sure that I'll really think that once I toss the car around a little bit. By the way, I retained the stock gearing ratio (3.08). In the meantime, here are a bunch of miscellaneous pictures. I think I took some 40 pictures or so. I'll supplement this thread as I find time to upload the pictures. Removing the exhaust 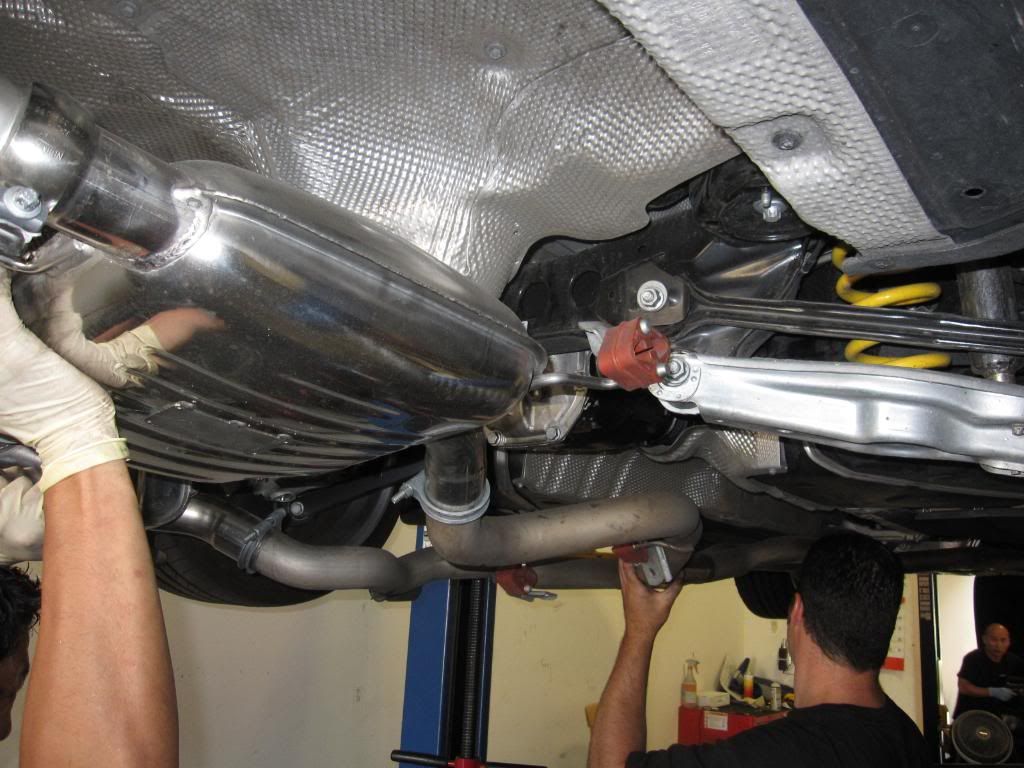 After everything was loosened up -- dropping the diff  Diff being lowered  Diff being lowered  Half shafts without diff installed  Diff cover cleaned and then prepared so that it can be attached to new diff unit  Tightening stuff up after diff was reinstalled  New torx screws being added to half shaft 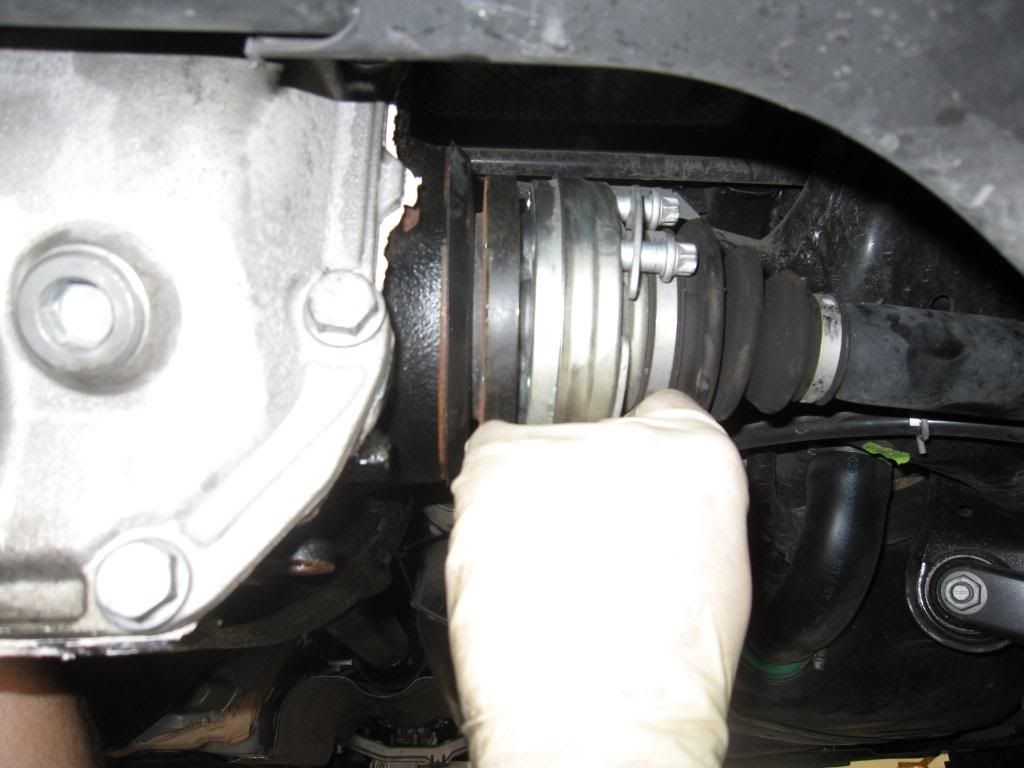 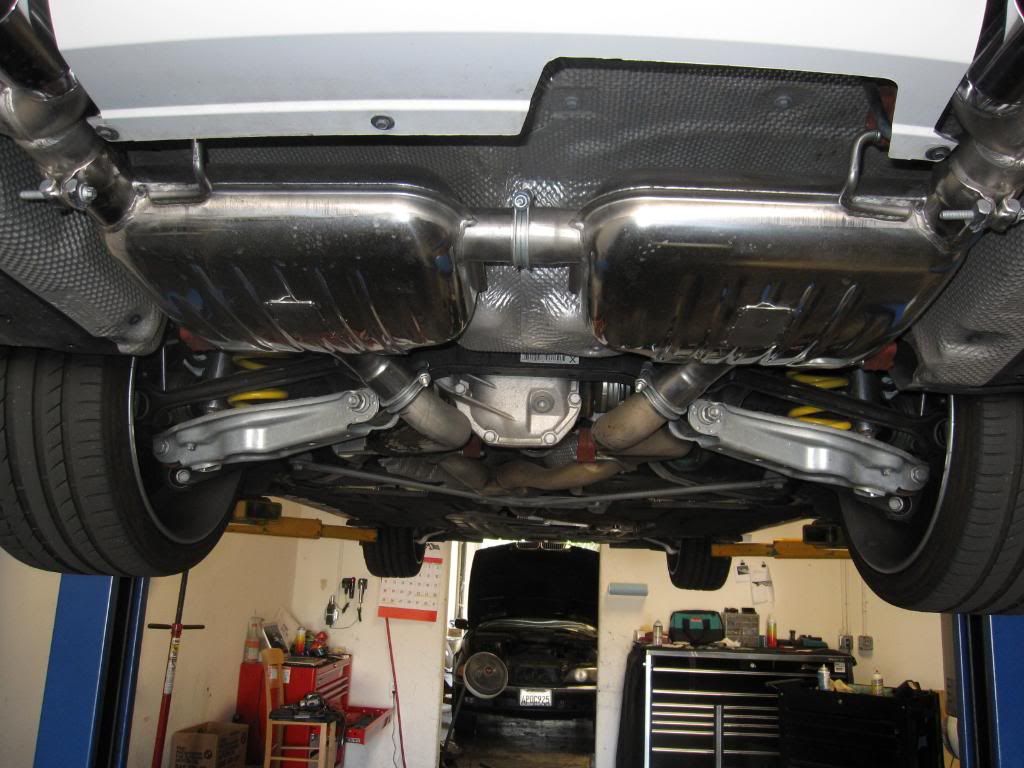       Scraping off the residue from the diff cover before applying adhesive  As I get more pictures, I will supplement this thread.
__________________
 Last edited by Marcus-SanDiego; 07-20-2010 at 06:17 PM.. |
 |
| Bookmarks |
|
|


