

| 12-19-2014, 04:36 PM | #1 |

1771
Rep 7,652
Posts |
IND | DIY | DCT Console Trim
F8X M3/M4 M Performance DCT Console Trim Install
There is no doubt that the interior on the F8X M3/M4 is stunning when compared to generations past. From the more aggressive panel designs to the carbon fiber trim accents, the interior embodies a more modern and sophisticated presence. The one area lacking on the DCT interior is the shift surround/console trim. This piece comes from the factory in a aluminum colored plastic and is a touch out of place when compared to the rest of the interior. Tools require: Painters tape (optional) Torx 15 Torx 10 interior pry tool Step 1: The first step in this process is to remove the carbon fiber center partition. This piece is secured in place by several tabs. To remove this piece carefully take an interior pry tool and wedge this tool in the seam on the underside of the trim. Simply apply some leverage and the tabs will begin to release. Step 2: Carefully remove the carbon piece and unclip the plug-n-play connector for the controls. Step 3: Remove the Torx 15 bolt shown in photo Step 4: Grab the bottom right part of the console and lift. The lifting motion will release the top right corner of the DCT trim. Step 5: With the top right corner of the trim released, carefully remove the trim without abruptly lifting. Step 6: Unclip the magenta PnP connector on the underside of the original DCT console trim. Step 7: Remove the electronics box on the underside of the console trim and transfer to the M Performance piece. There are three wire guides for the pink wires. Place these wires in the guide for a tidy install. Step 8: Reinstall the PnP connector into the electronics box and place the carbon fiber DCT M Performance trim into the trim slot. Step 9: Install Torx 15 screw and blue PnP connector. Carefully snap carbon trim back into place. 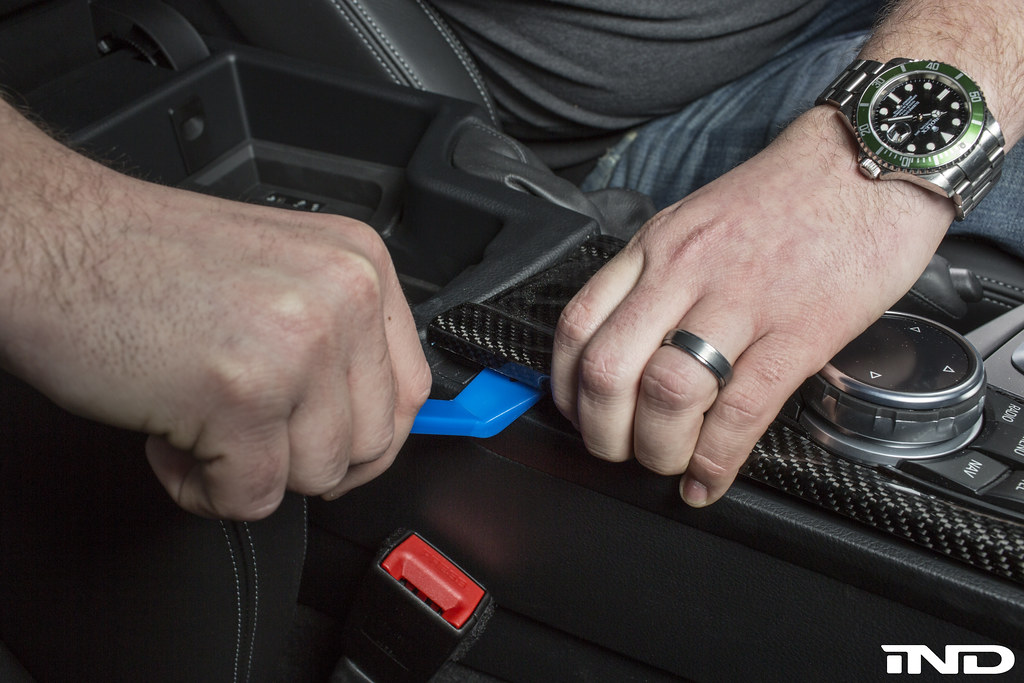  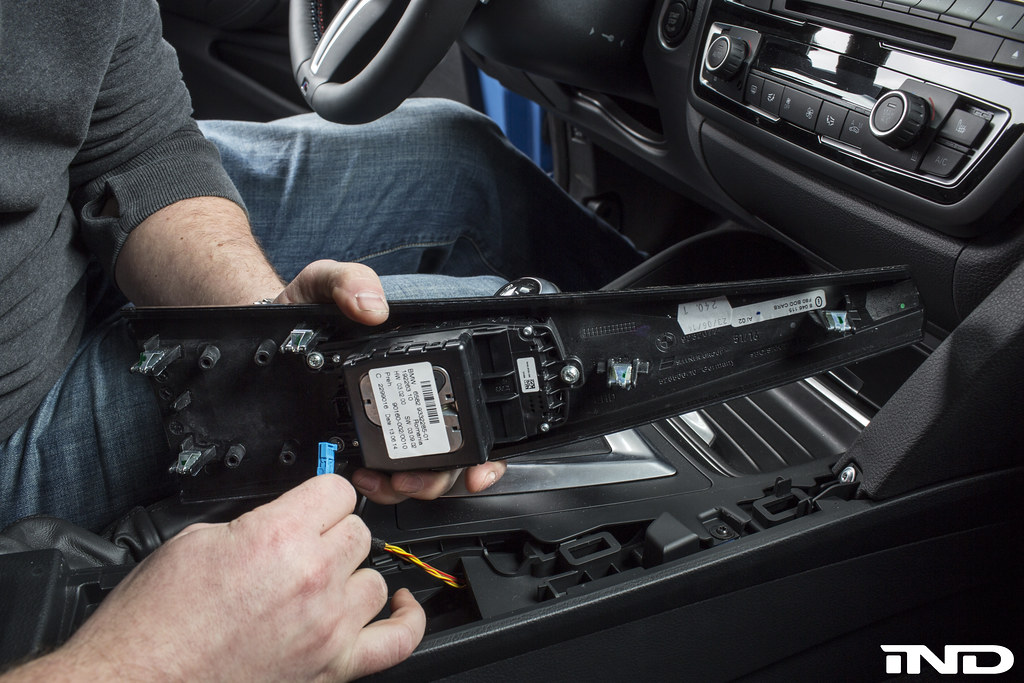  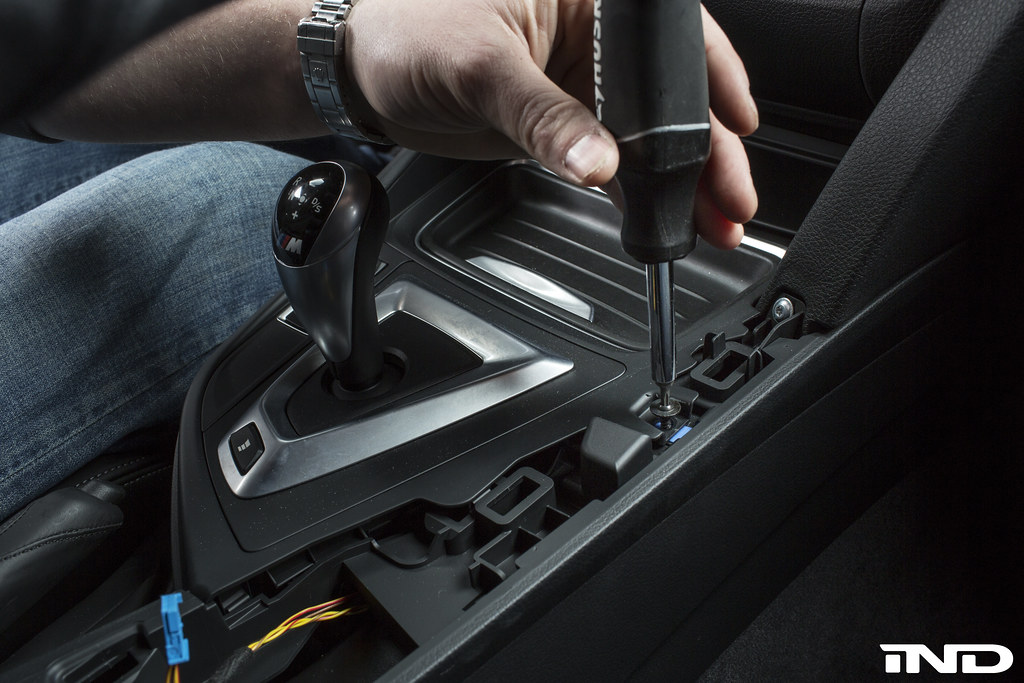 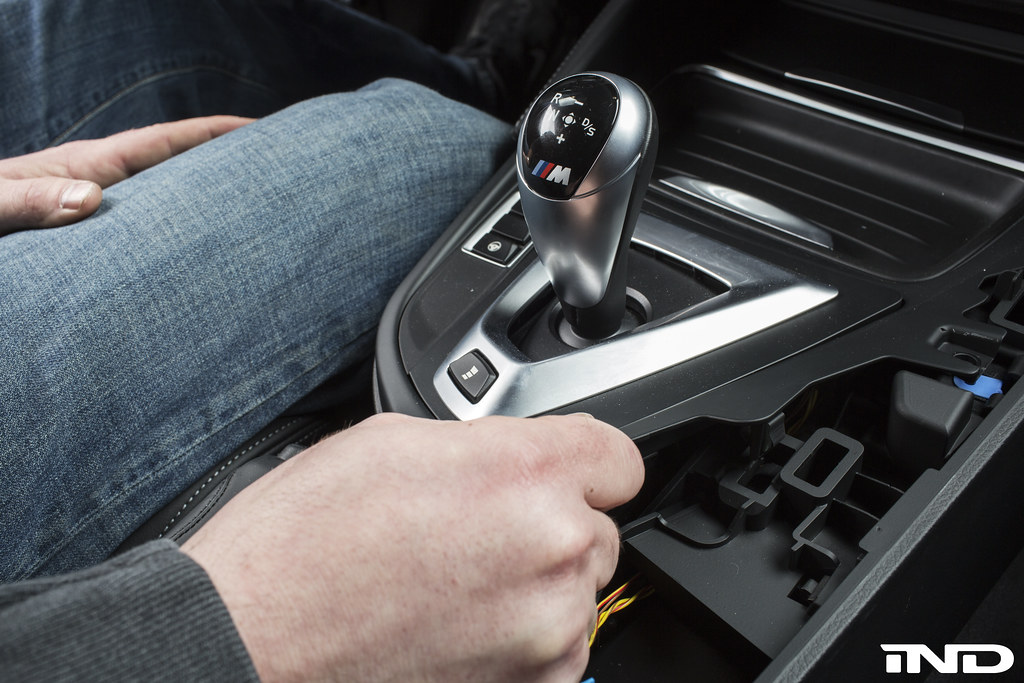 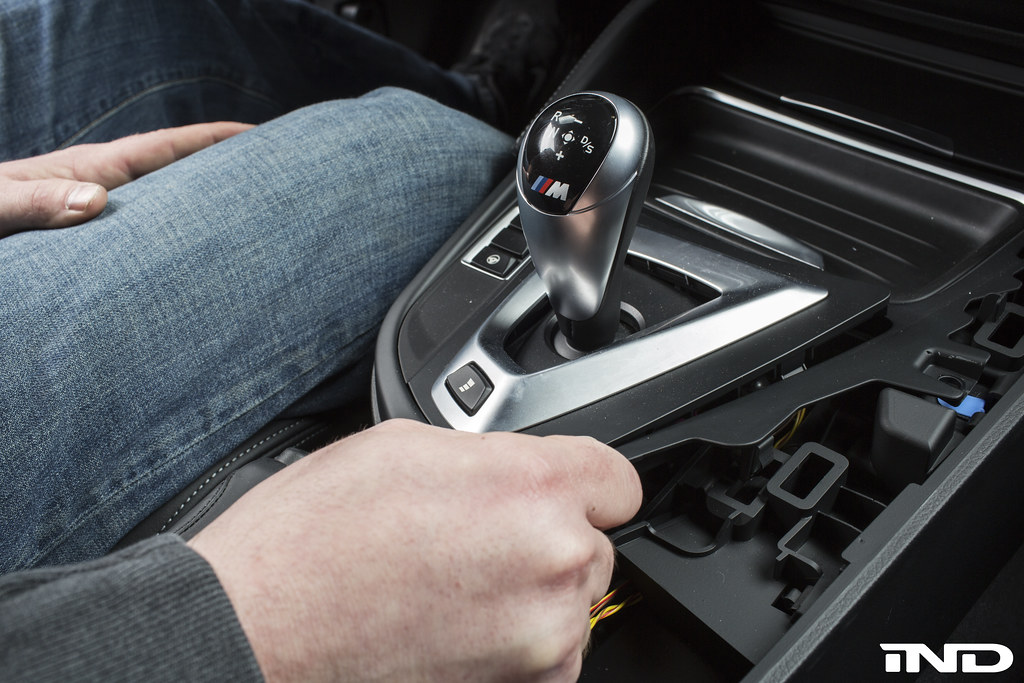 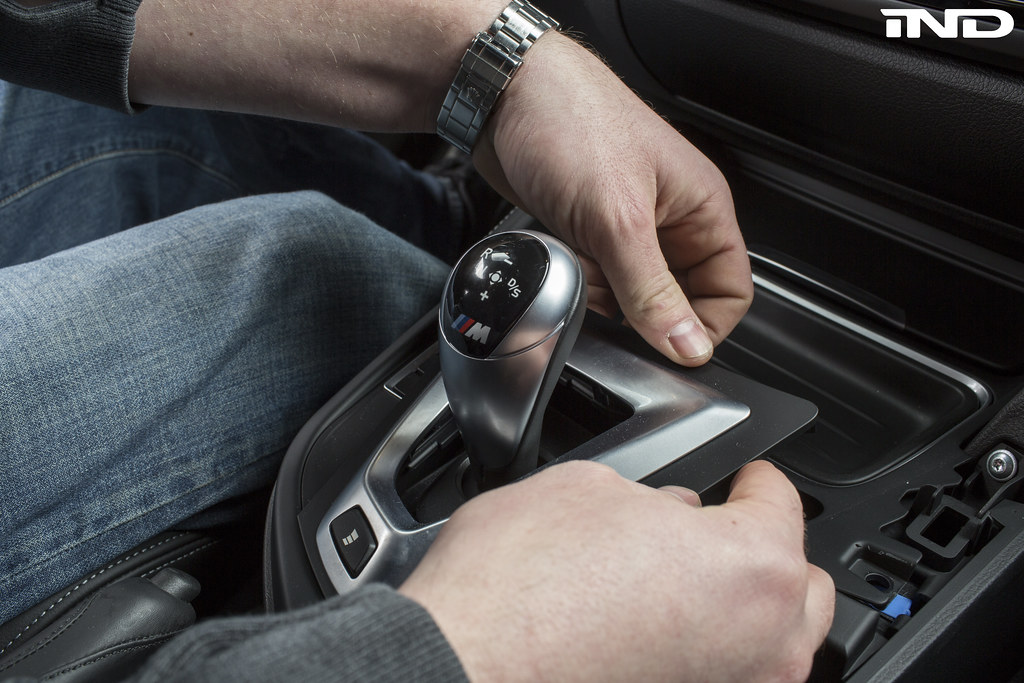 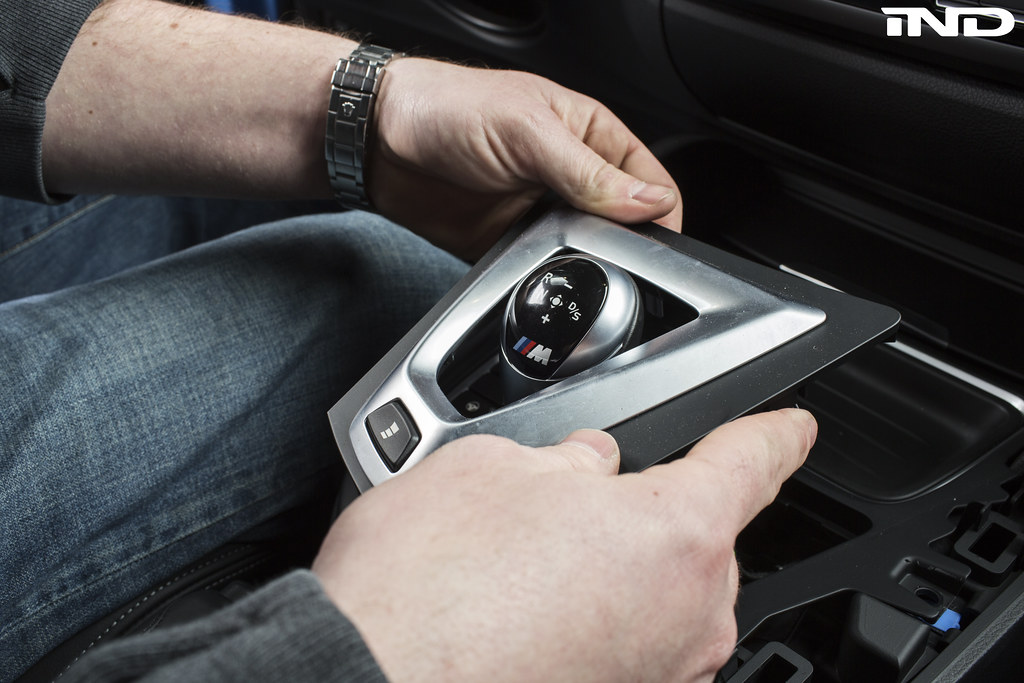   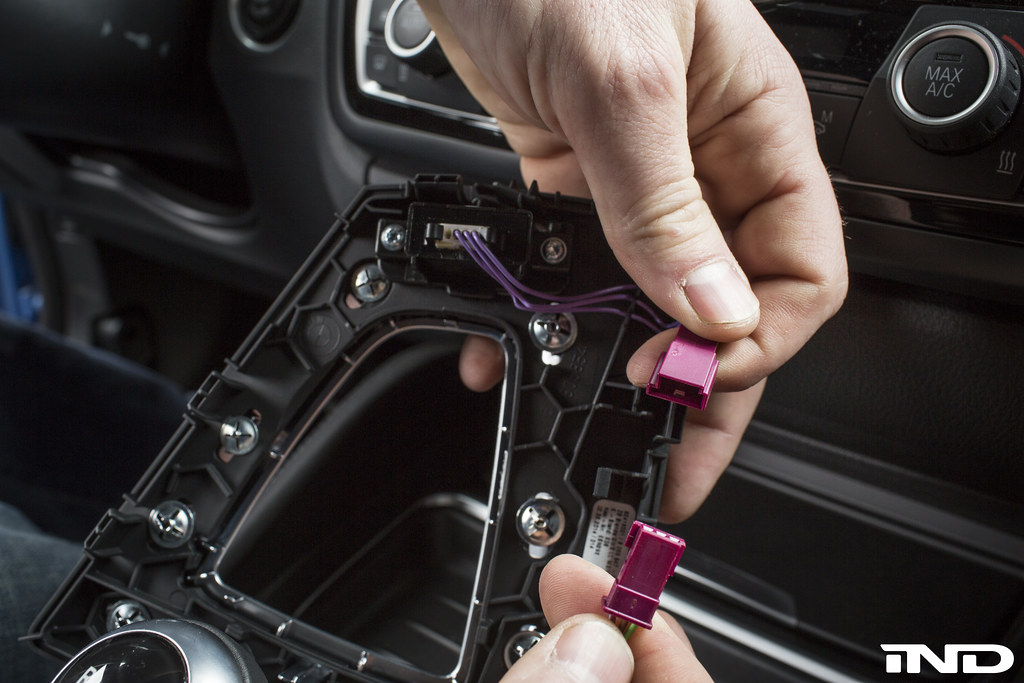 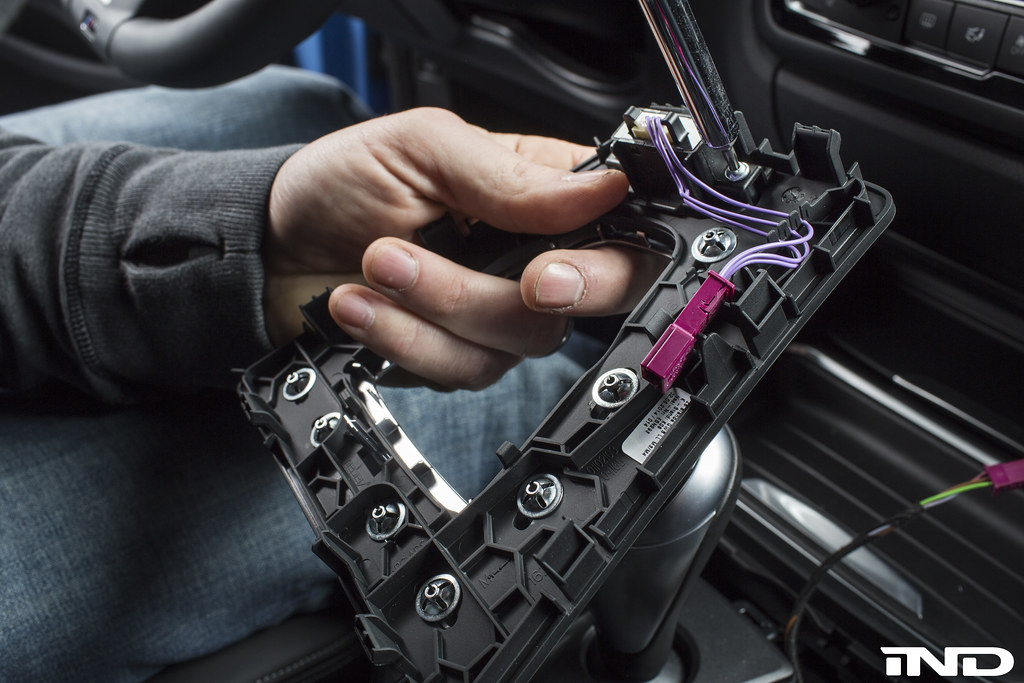       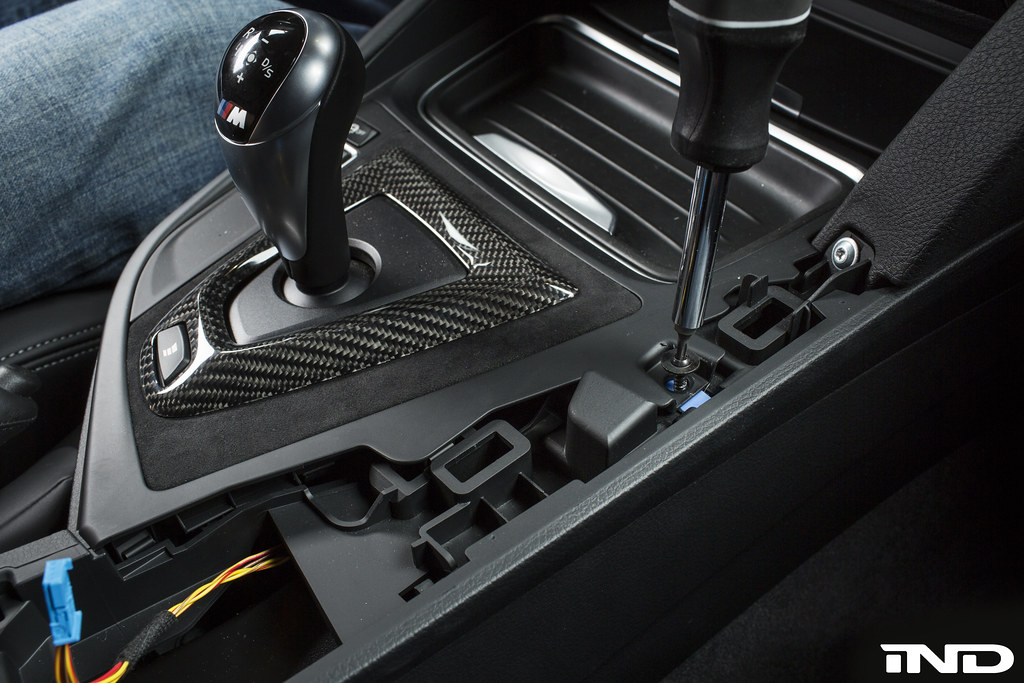 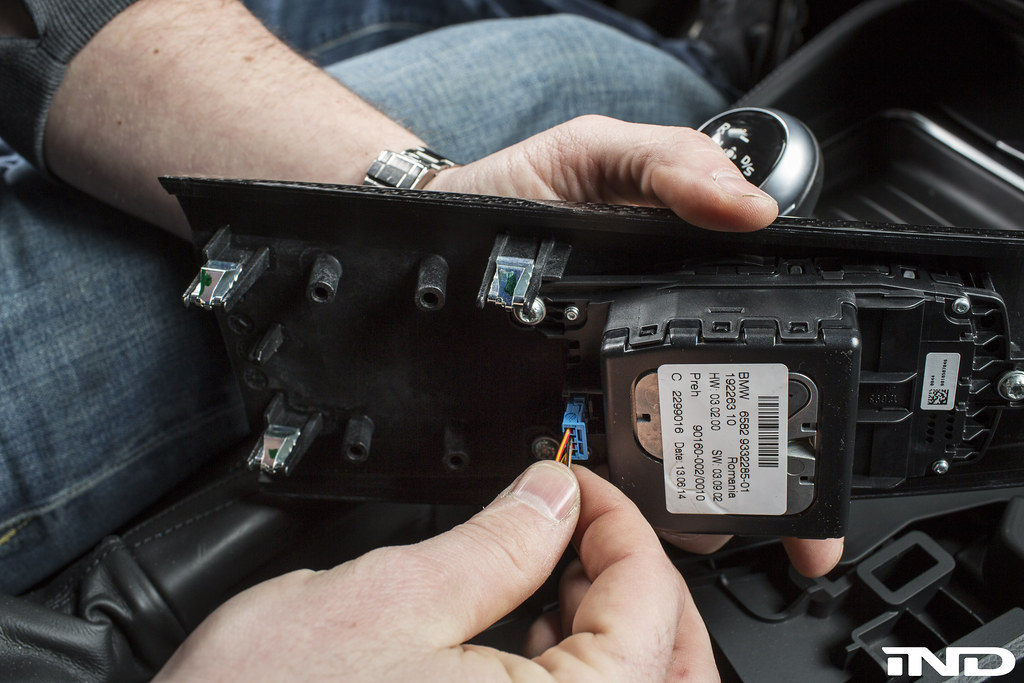 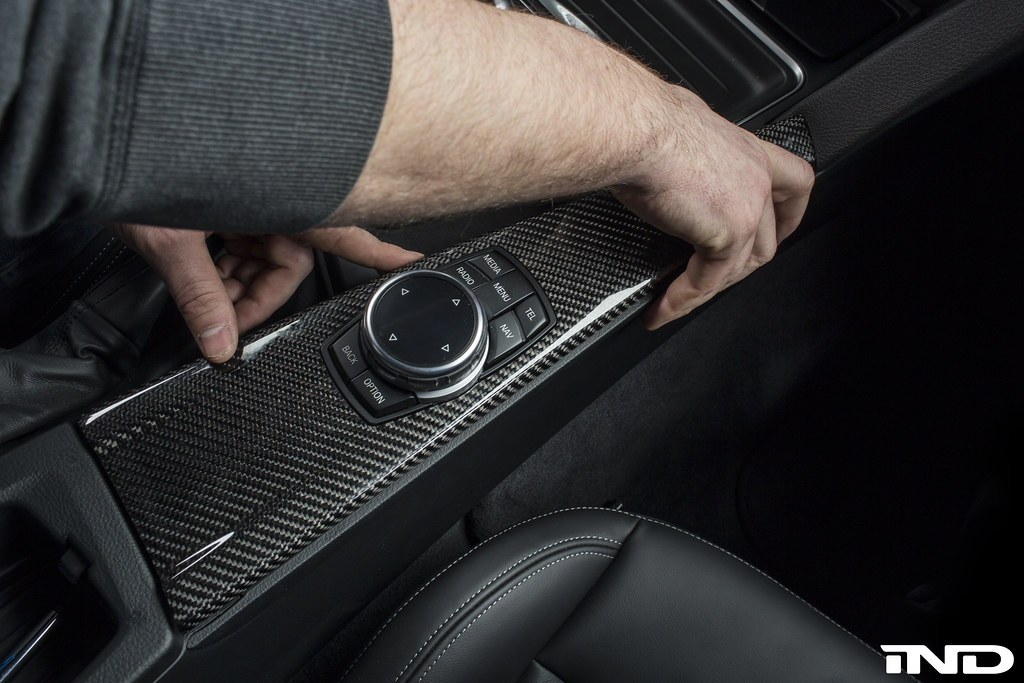 
__________________
|
| 12-19-2014, 04:59 PM | #2 |
|
New Member
17
Rep 17
Posts |
couple of newbie questions,
1. I see you are removing the Idrive part, does that part have to be taken out in order to remove the console trim, or can I just pry that part alone? 2. Since we are unplugging a couple things, does this mean the battery has to be disconnected, or is it safe to remove the plug n play out while plugged into the battery? Thanks!! |
|
Appreciate
0
|
| 12-19-2014, 05:07 PM | #3 | |
|
1771
Rep 7,652
Posts |
Quote:
2. Disconnecting the battery is not required for this installation.
__________________
|
|
|
Appreciate
0
|
| 01-29-2015, 03:52 PM | #4 | |
|
Major

748
Rep 1,478
Posts |
Quote:
__________________
Individual M4 Convertible ED Sept 2014
|
|
|
Appreciate
0
|
| 01-29-2015, 04:33 PM | #5 | |
|
Major
748
Rep 1,478
Posts |
Quote:
__________________
Individual M4 Convertible ED Sept 2014
|
|
|
Appreciate
0
|
| 01-30-2015, 01:02 PM | #6 | |
|
1771
Rep 7,652
Posts |
Quote:
There are multiple ways to install a single component. The method in the DIY is the easiest to show and provides the least amount of damage potential. With that said, this is a DIY thread for communities benefit and we always welcome additional tips, methods, and photos.
__________________
|
|
|
Appreciate
0
|
| 02-07-2015, 07:56 AM | #7 | |
|
Major
748
Rep 1,478
Posts |
Quote:
__________________
Individual M4 Convertible ED Sept 2014
|
|
|
Appreciate
0
|
| 12-16-2015, 08:06 PM | #10 | ||
|
Private First Class

66
Rep 154
Posts |
Quote:
 I was able to change out my center console cover in about 5 minutes by taking the shortcut and popping off the cover directly. I was able to change out my center console cover in about 5 minutes by taking the shortcut and popping off the cover directly. |
||
|
Appreciate
0
|
| 12-28-2015, 11:14 AM | #11 | |
|
Registered
47
Rep 77
Posts |
Quote:
__________________
2016 Mineral Grey M3 LKDA/DCT/ZEC/2VF/5DL - Ordered 9/22/15 - Week 43 Build - Picked up 11/19/15
|
|
|
Appreciate
2
iatacs19460.50 |
| 02-05-2016, 01:46 PM | #12 | |
|
Second Lieutenant
 
36
Rep 276
Posts |
Quote:
__________________
2020 BMW M340i xdrive
2016 BMW M4 (sold) 2015 BMW M4 (sold) 2014 Audi RS5 (sold) 2012 Audi TT RS (sold) |
|
|
Appreciate
0
|
| 02-08-2016, 09:24 AM | #14 | |
|
Registered
47
Rep 77
Posts |
Quote:
__________________
2016 Mineral Grey M3 LKDA/DCT/ZEC/2VF/5DL - Ordered 9/22/15 - Week 43 Build - Picked up 11/19/15
|
|
|
Appreciate
0
|
| 04-21-2016, 07:40 PM | #15 |
|
Lieutenant
202
Rep 499
Posts
Drives: 2016 F80
Join Date: Mar 2010
Location: Texas
|
Wow. I have no DIY skills what so ever and I did that in a just a few minutes no problem.
The hardest part was finding the screwdriver bit I dropped between the seat and the console. I did as the others did and just used a piece of painters tape and pried it off directly. I pried it up from the bottom middle with a pry tool and then pulled a corner with my finger lightly and it popped free. Be careful with the wiring as the that is some small gauge wire and wouldn't take much to break it. I didn't disconnect the plug, I just left it all intact and unscrewed the button. Thanks for all the detailed pictures and instructions! |
|
Appreciate
0
|
| 06-07-2016, 03:29 PM | #16 | |
|
Newbee
27
Rep 139
Posts |
Quote:
Your way reduces the likely hood of causing damage to the console pieces. Again, thank you for posting this well illustrated instructions. 
__________________
 2016 BMW M4 Convertible(F83). 2007 Dodge Charger SRT8 "SuperBee" 2012 Dodge Charger SRT8 (Wife's Car) |
|
|
Appreciate
3
paliknight2192.50 Graves1130.00 |
| 08-05-2017, 07:35 PM | #17 |
|
Sicario
1130
Rep 1,248
Posts
Drives: 2018 M3 ZCP
Join Date: Jul 2017
Location: Fort Stewart
|
Where was this piece purchased?
__________________
Ryan King
2018 M3 ZCP |
|
Appreciate
0
|
| 03-24-2018, 09:02 AM | #19 |
|
Second Lieutenant
156
Rep 220
Posts |
I was fortunate that my duct cover popped right out by slipping a credit card down along the rear edge. Literally 10 second removal time. Moved the switch using T10 driver, the popped in the carbon cover. This did not take more than 3 minutes total. Looks really good! I highly recommend.
|
|
Appreciate
1
Maitre_Absolut881.50 |
| 09-03-2018, 08:10 PM | #21 | |
|
Captain
882
Rep 886
Posts |
Quote:
I used 3 credit cards on their long side to catch 2 clips each: one bottom, right and when I put in the left side it popped up a bit. T10 is all you need after. 
__________________
23 Audi RS6
23 BMW X3 30e Msport 18 M3 CS 17 Porsche Macan GTS 14 Audi S4 |
|
|
Appreciate
0
|
| 05-07-2021, 09:41 PM | #22 |
|
New Member
10
Rep 18
Posts |
Does anyone make this without alcantara? Id rather have the surround painted gloss black framing the carbon fiber. I know Im the minority but personally hate alcantara...
|
|
Appreciate
0
|
Post Reply |
| Bookmarks |
|
|


