|
|
|
|
 |

|
 |
BMW Garage | BMW Meets | Register | Today's Posts | Search |
 |

|
BMW 3-Series (E90 E92) Forum
>
How To: E90 LCI Facelift Style Tail Lights.
|
 |
| 02-20-2011, 05:31 PM | #1 |
|
Addiction
39
Rep 121
Posts |
How To: E90 LCI Facelift Style Tail Lights.
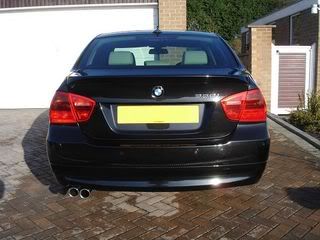
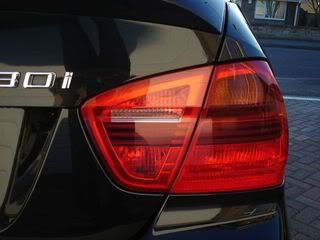
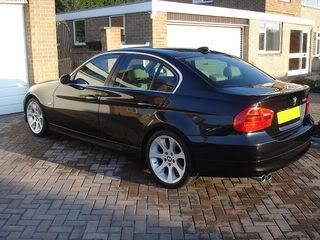
I was asked to create this, however I do not have step-by-step photos.
This guide will allow you to modify your tail lights to make them have the same style as the LCI facelift. You will need: Self adhesive red window tint film Socket set Flat head screw driver / trim tool Ruler Squidgy/credit card Permanent pen/marker Alcohol/Meths/degreaser Empty fine spray bottle Water Washing up liquid Blade/stanley knife Scissors Hairdryer Guide 1] Remove your boot mounted tail lights by following the appropriate guide found here 2] Clean units with soapy water, dry, then wipe with Alcohol/Meths. 3] Cut 2 roughly sized sheets of the window tint film and offer them to the units. 4] You will need to cut a rectangular section out of the film so that the reverse light shines through. You can gauge the size whilst the film is offered to the unit. Mark the length and height of the section with a marker [on the removable film side]. 5] Stick the 2 sheets together with tape so that you do not need to cut twice! Using your blade and a ruler cut your rectangular section out of the edge of the film. 6] Fill your spray bottle with water and a drop of washing up liquid and squirt the surface of the unit. 7] Offer the film to the unit and gently place in correct position, use your squidgy or credit card to swipe the water solution from centre outward. 8] Trim the around the edges of the film with your sharp blade, be very careful not to make contact with the unit. 9] Continue to swipe the water out to the edges, you will find that they may not stick down. This is where the hairdryer comes in. Blow the edges with hot air pushing them down until they stick. 10] Once done refit and admire! Photos: 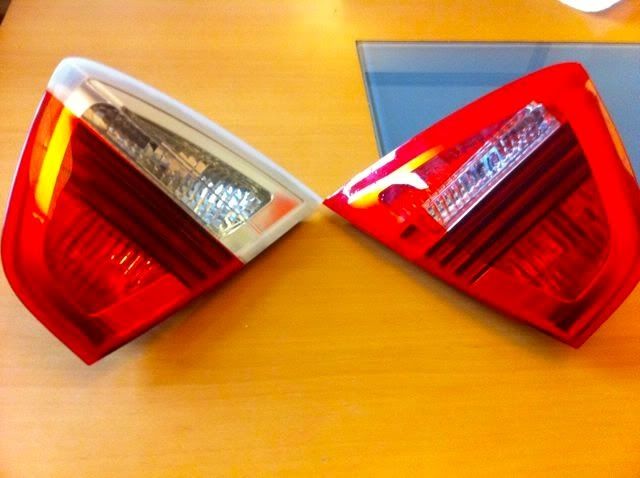 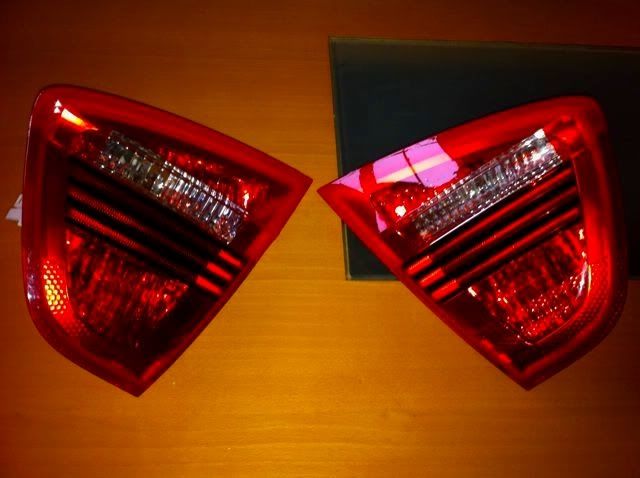 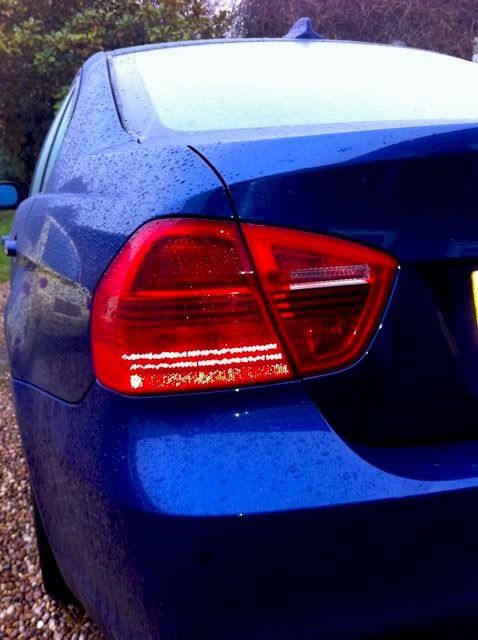 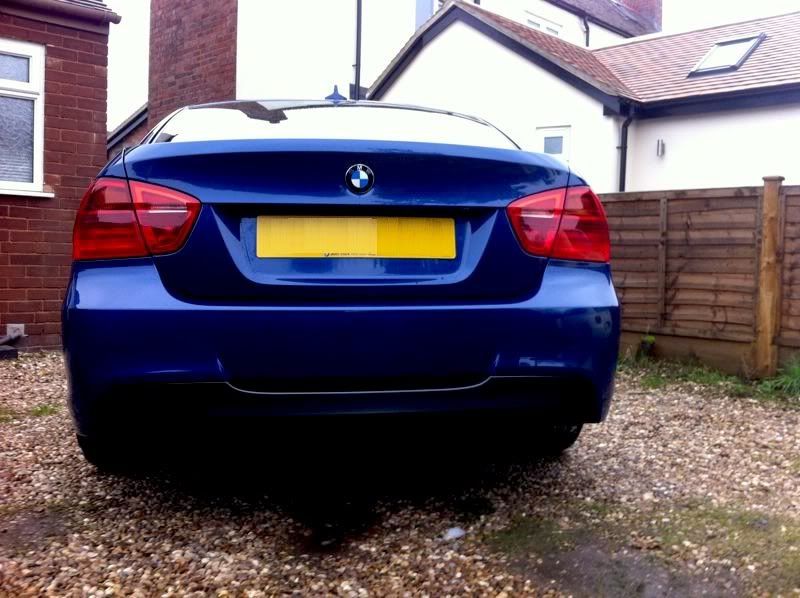  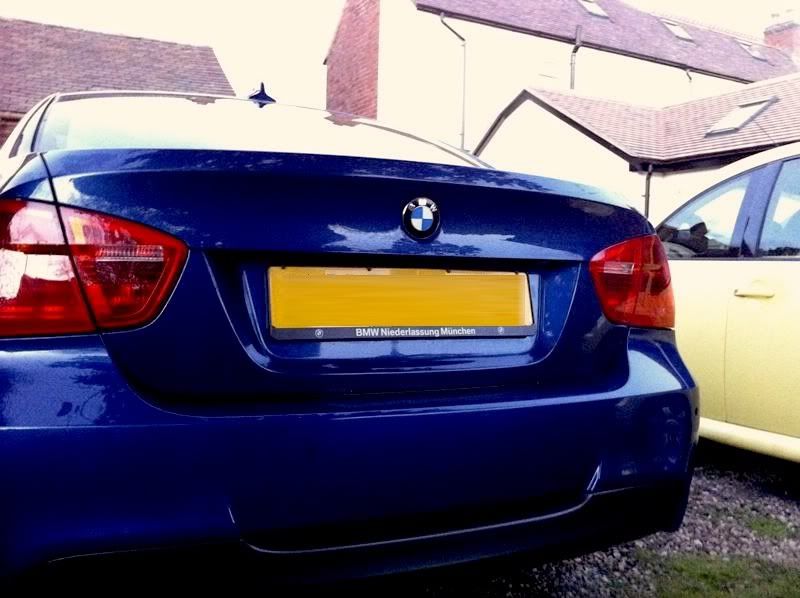 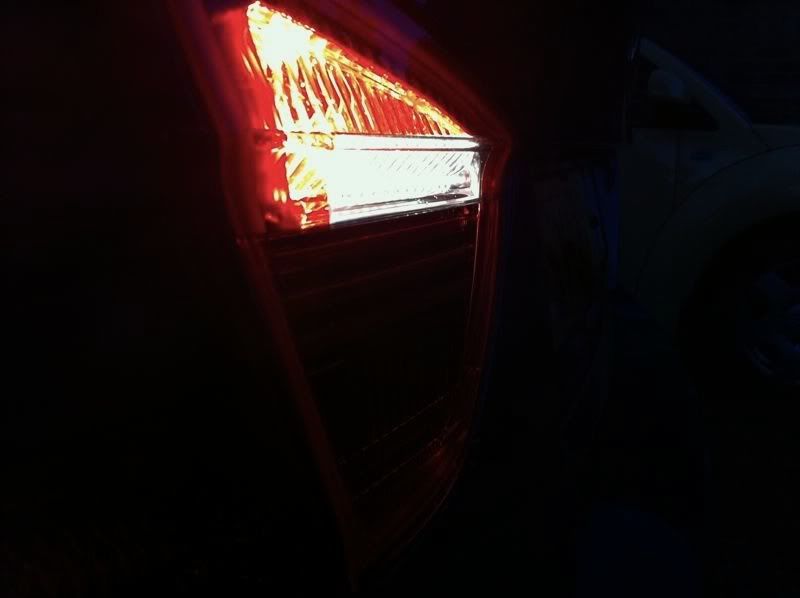 Last edited by chrismac; 02-26-2011 at 05:37 PM.. |
| 02-20-2011, 07:05 PM | #4 |
|
Lieutenant Colonel
 
67
Rep 1,543
Posts
Drives: M235i
Join Date: May 2009
Location: Cincinnati
|
Nicely done! Definitely a nice alternative to Blacklines if you don't want to spend the money and like the red look.
|
|
Appreciate
0
|
| 02-23-2011, 06:17 PM | #8 |
|
SFGI4NT
33
Rep 1,185
Posts |
Does the red tint match the outer light housing or did you tint both sections? Do you have any pictures of the car in reverse, does light only shine through the open section or the tint as well? Also, could you post a link to what tint you bought exactly, there's many options I see.
Sorry for all the questions, just have wanted to this for a while and was curious because I just may do it now. Thanks for the diy, looks great  |
|
Appreciate
0
|
| 02-24-2011, 02:57 PM | #9 |
|
Addiction
39
Rep 121
Posts |
No, I just covered the white section. I have no issues with reversing [I have to do it every night up my unlit rural drive].
I dont have any pics of the reverse light in action however I can do so at some point [hard when your on your own!] This is what I purchased: http://cgi.ebay.co.uk/ws/eBayISAPI.d...ht_5060wt_1117 Thanks |
|
Appreciate
0
|
| 02-24-2011, 10:04 PM | #11 |
|
Captain

65
Rep 653
Posts
Drives: Red E90, Red E36 M3
Join Date: Dec 2010
Location: Colorado Springs, CO
|
I like it
__________________
 |
|
Appreciate
0
|
| 03-02-2011, 02:54 PM | #13 | |
|
SFGI4NT
33
Rep 1,185
Posts |
Quote:
|
|
|
Appreciate
0
|
| 03-06-2011, 01:23 PM | #14 |
|
New Member

0
Rep 20
Posts |
I did my lights today following the DIY - excellent result and looks
 Only thing I did different was at the end I finished off the film edges with a smooth file (used to do this when fitting window tints) to blend them into the edge of the light - will reduce the risk of them peeling. Excellent DIY - thanks mate. Dave. |
|
Appreciate
0
|
| 03-06-2011, 01:24 PM | #15 | |
|
Grozniy
179
Rep 2,602
Posts |
Quote:
__________________
-fatman
|
|
|
Appreciate
0
|
| 03-06-2011, 01:53 PM | #16 | |
|
New Member
0
Rep 20
Posts |
Quote:
Dave. |
|
|
Appreciate
0
|
| 03-09-2011, 11:27 AM | #20 | |
|
New Member
0
Rep 20
Posts |
Quote:
bumere90 - yes the same material from ebay. It gives enough to do about 6 sets of lights. Plently spare if anybody close to me wants some.... |
|
|
Appreciate
0
|
| 03-14-2011, 05:57 AM | #22 |
|
Colonel
 
62
Rep 2,472
Posts |
Did this myself yesterday. Was my first time working with tint film found it a bit tricky, made an ar*e of the first attempt but got it second time. I cut the clear bits with angled ends to follow the lines of the tail light just like on the lci models.
I also added another step to the process that seemed to really help with eliminating air bubbles (I've still got 1 or 2 mind). Between steps 5 and 6 I sprayed the light unit and put the film on with the backing still on and heated it with the hair dryer while kind of shaping it to the light with my fingers. I then cleaned and dried the unit and when applying the film sprayed the film rather than the unit. For some reason this worked better for me. Some bad pictures taken in the rain to show the results. |
|
Appreciate
0
|
 |
| Bookmarks |
|
|