In my guide I will be installing USA/Canadian spec Red Tail Lights on USA/Canadian spec car. North American spec cars have 4 pins on inner trunk lid tail lights, while the rest of the world has 5.
Due to North American cars operating on 4 pins, you will NOT need to run 2 extra wires to the passenger footwell BDC, as that's what you might have seen in other guides out of Europe, or Asia.
(Btw running to BDC is a proper OEM way, but you can just do a shortcut, by running a wire from the inner lights, and tapping to the outer lights).
Let's Begin:
Parts that you will need:
I've bought all my parts from an eBay seller Euroactive. Shipping was fast and they replied to msgs almost instantly. Do recommend!
- Outer Left tail light: 63218493813
- Outer Right tail light: 63218493814
- Inner Left tail light on the trunk: 63218493819
- Inner Right tail light on the trunk: 63218493820
- Trim panel water channel Drip rail Left: 63218493821
- Trim panel water channel Drip rail Right: 63218493822
- Tail light finisher, trunk lid, Left: 51499448943
- Tail light finisher, trunk lid, Right: 51499448944

 Tools that you will need:
- Tack Lifter screwdriver
- Plastic panel removal tool
- Ratchet with 10mm socket
- 1.2mm flat head screwdriver
 Lets begin on inner trunk lid tail lights:
With trunk open start by removing 8 Expanding rivets:

Unlock the bracket for Warning Triangle. Remove the bracket by unlocking 2 clips:
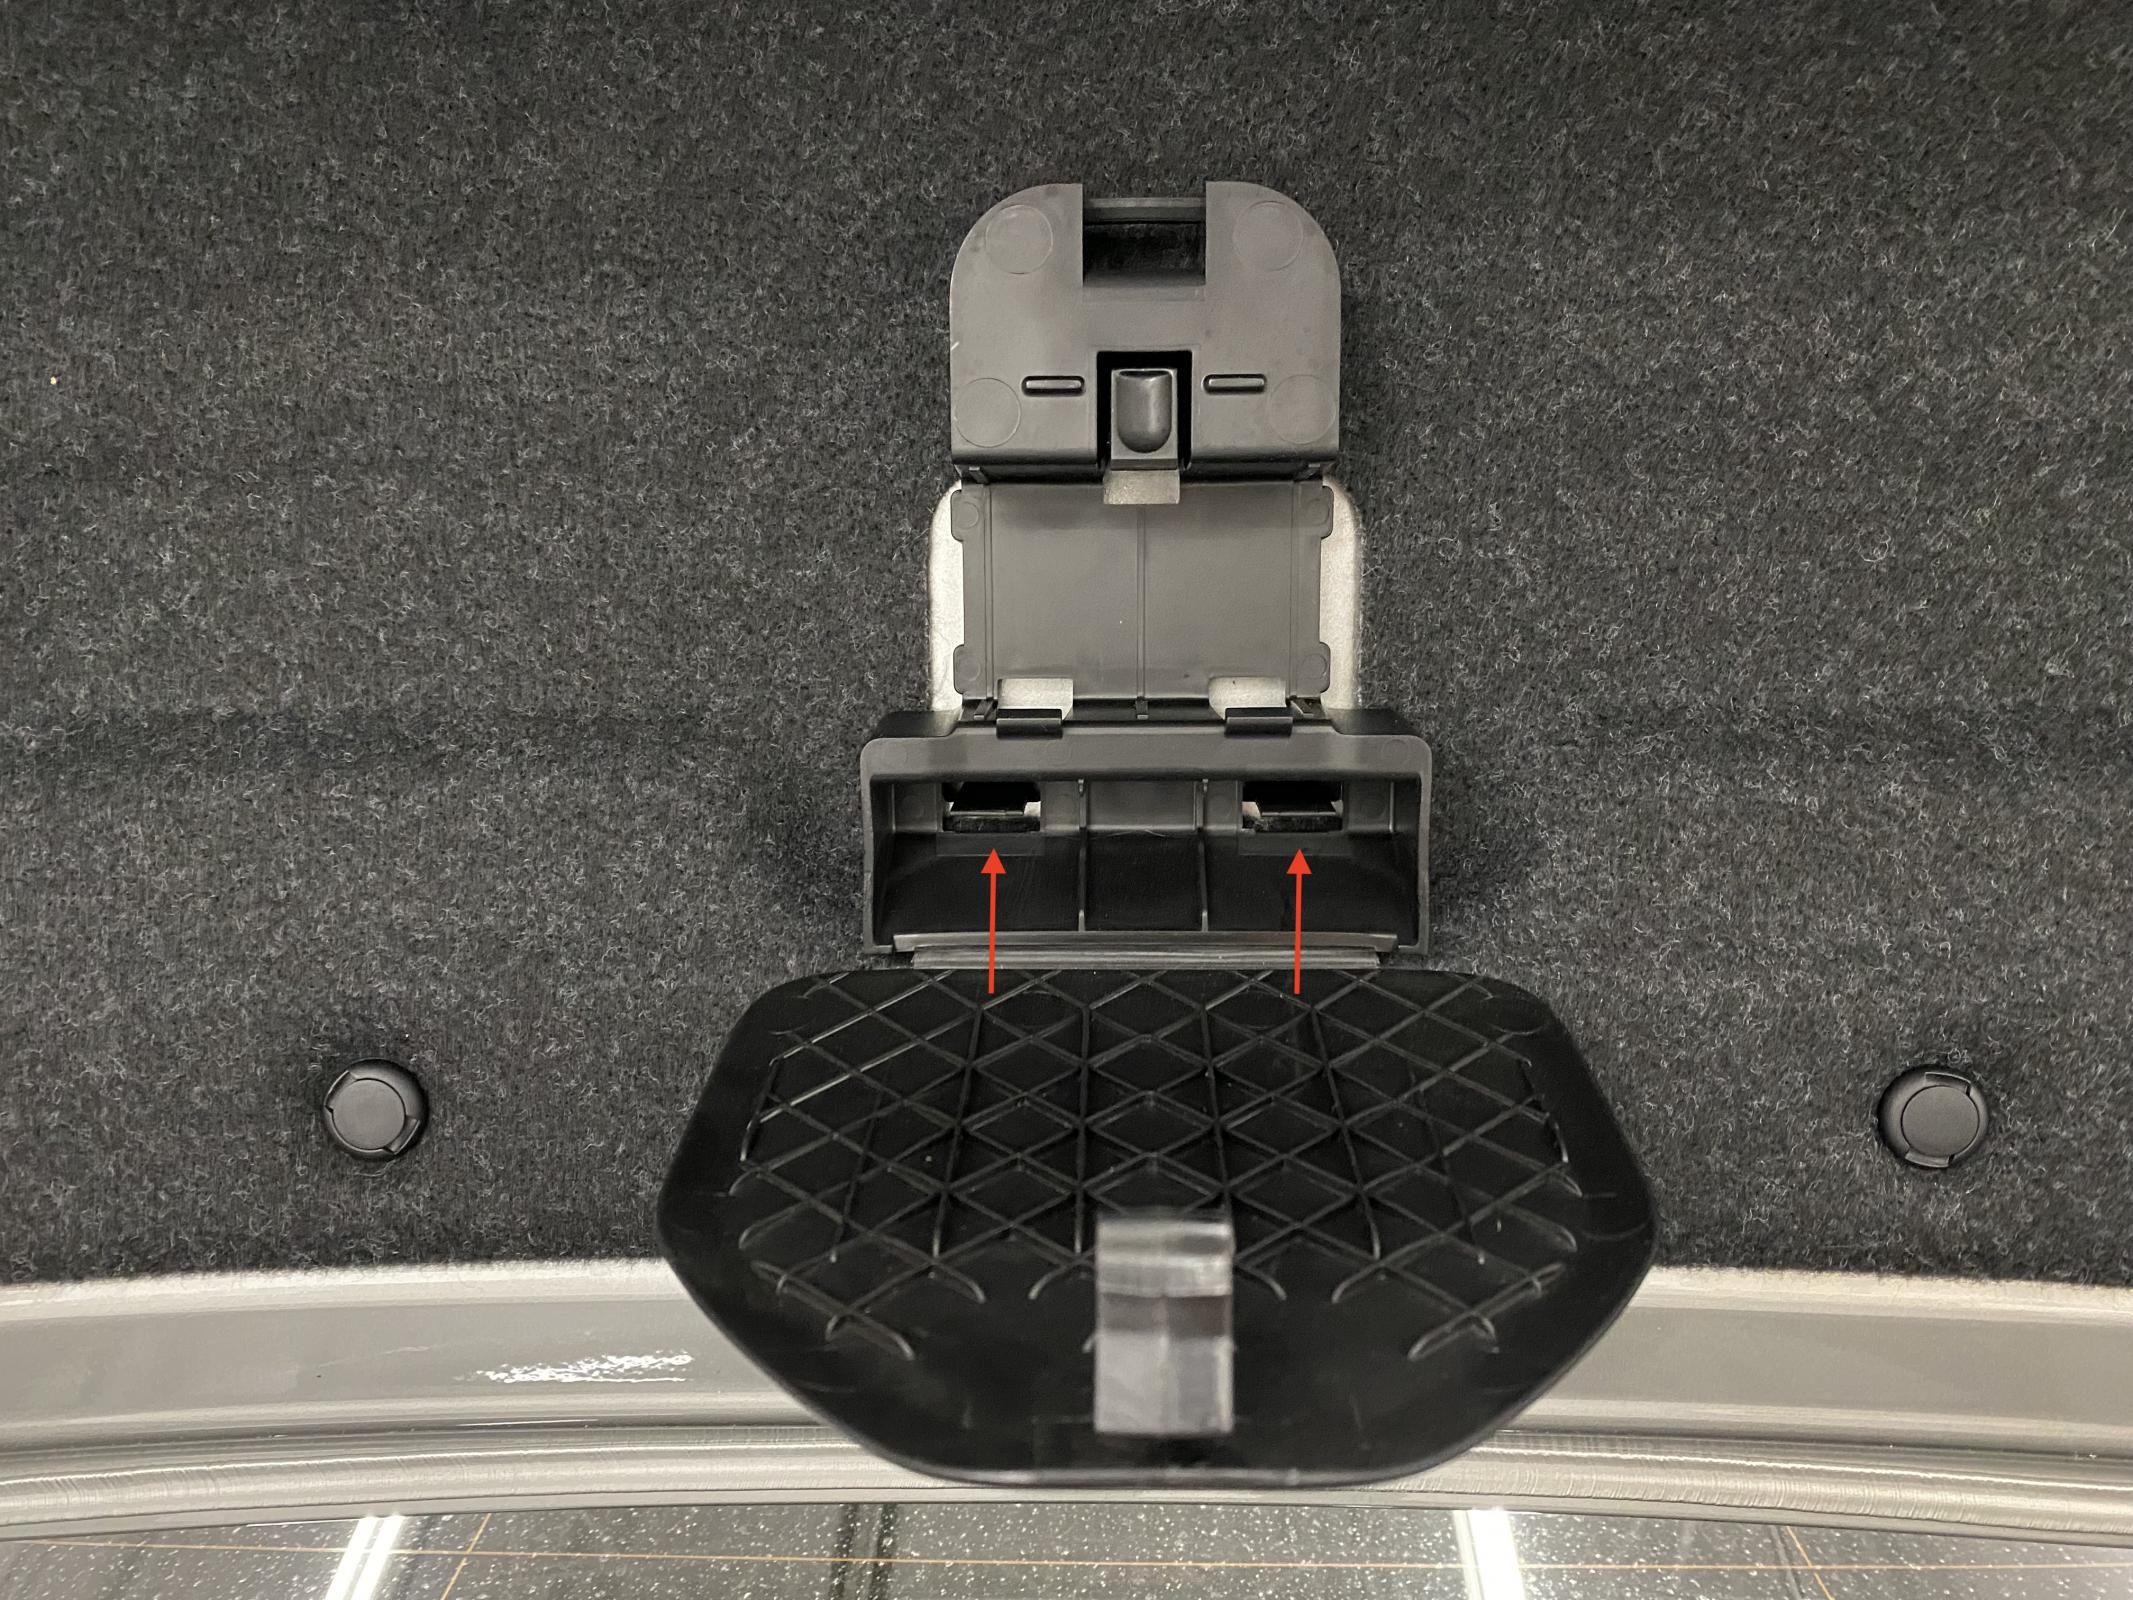
With the panel removal tool, unclip and then disconnect the trunk lid opening/closing controls:


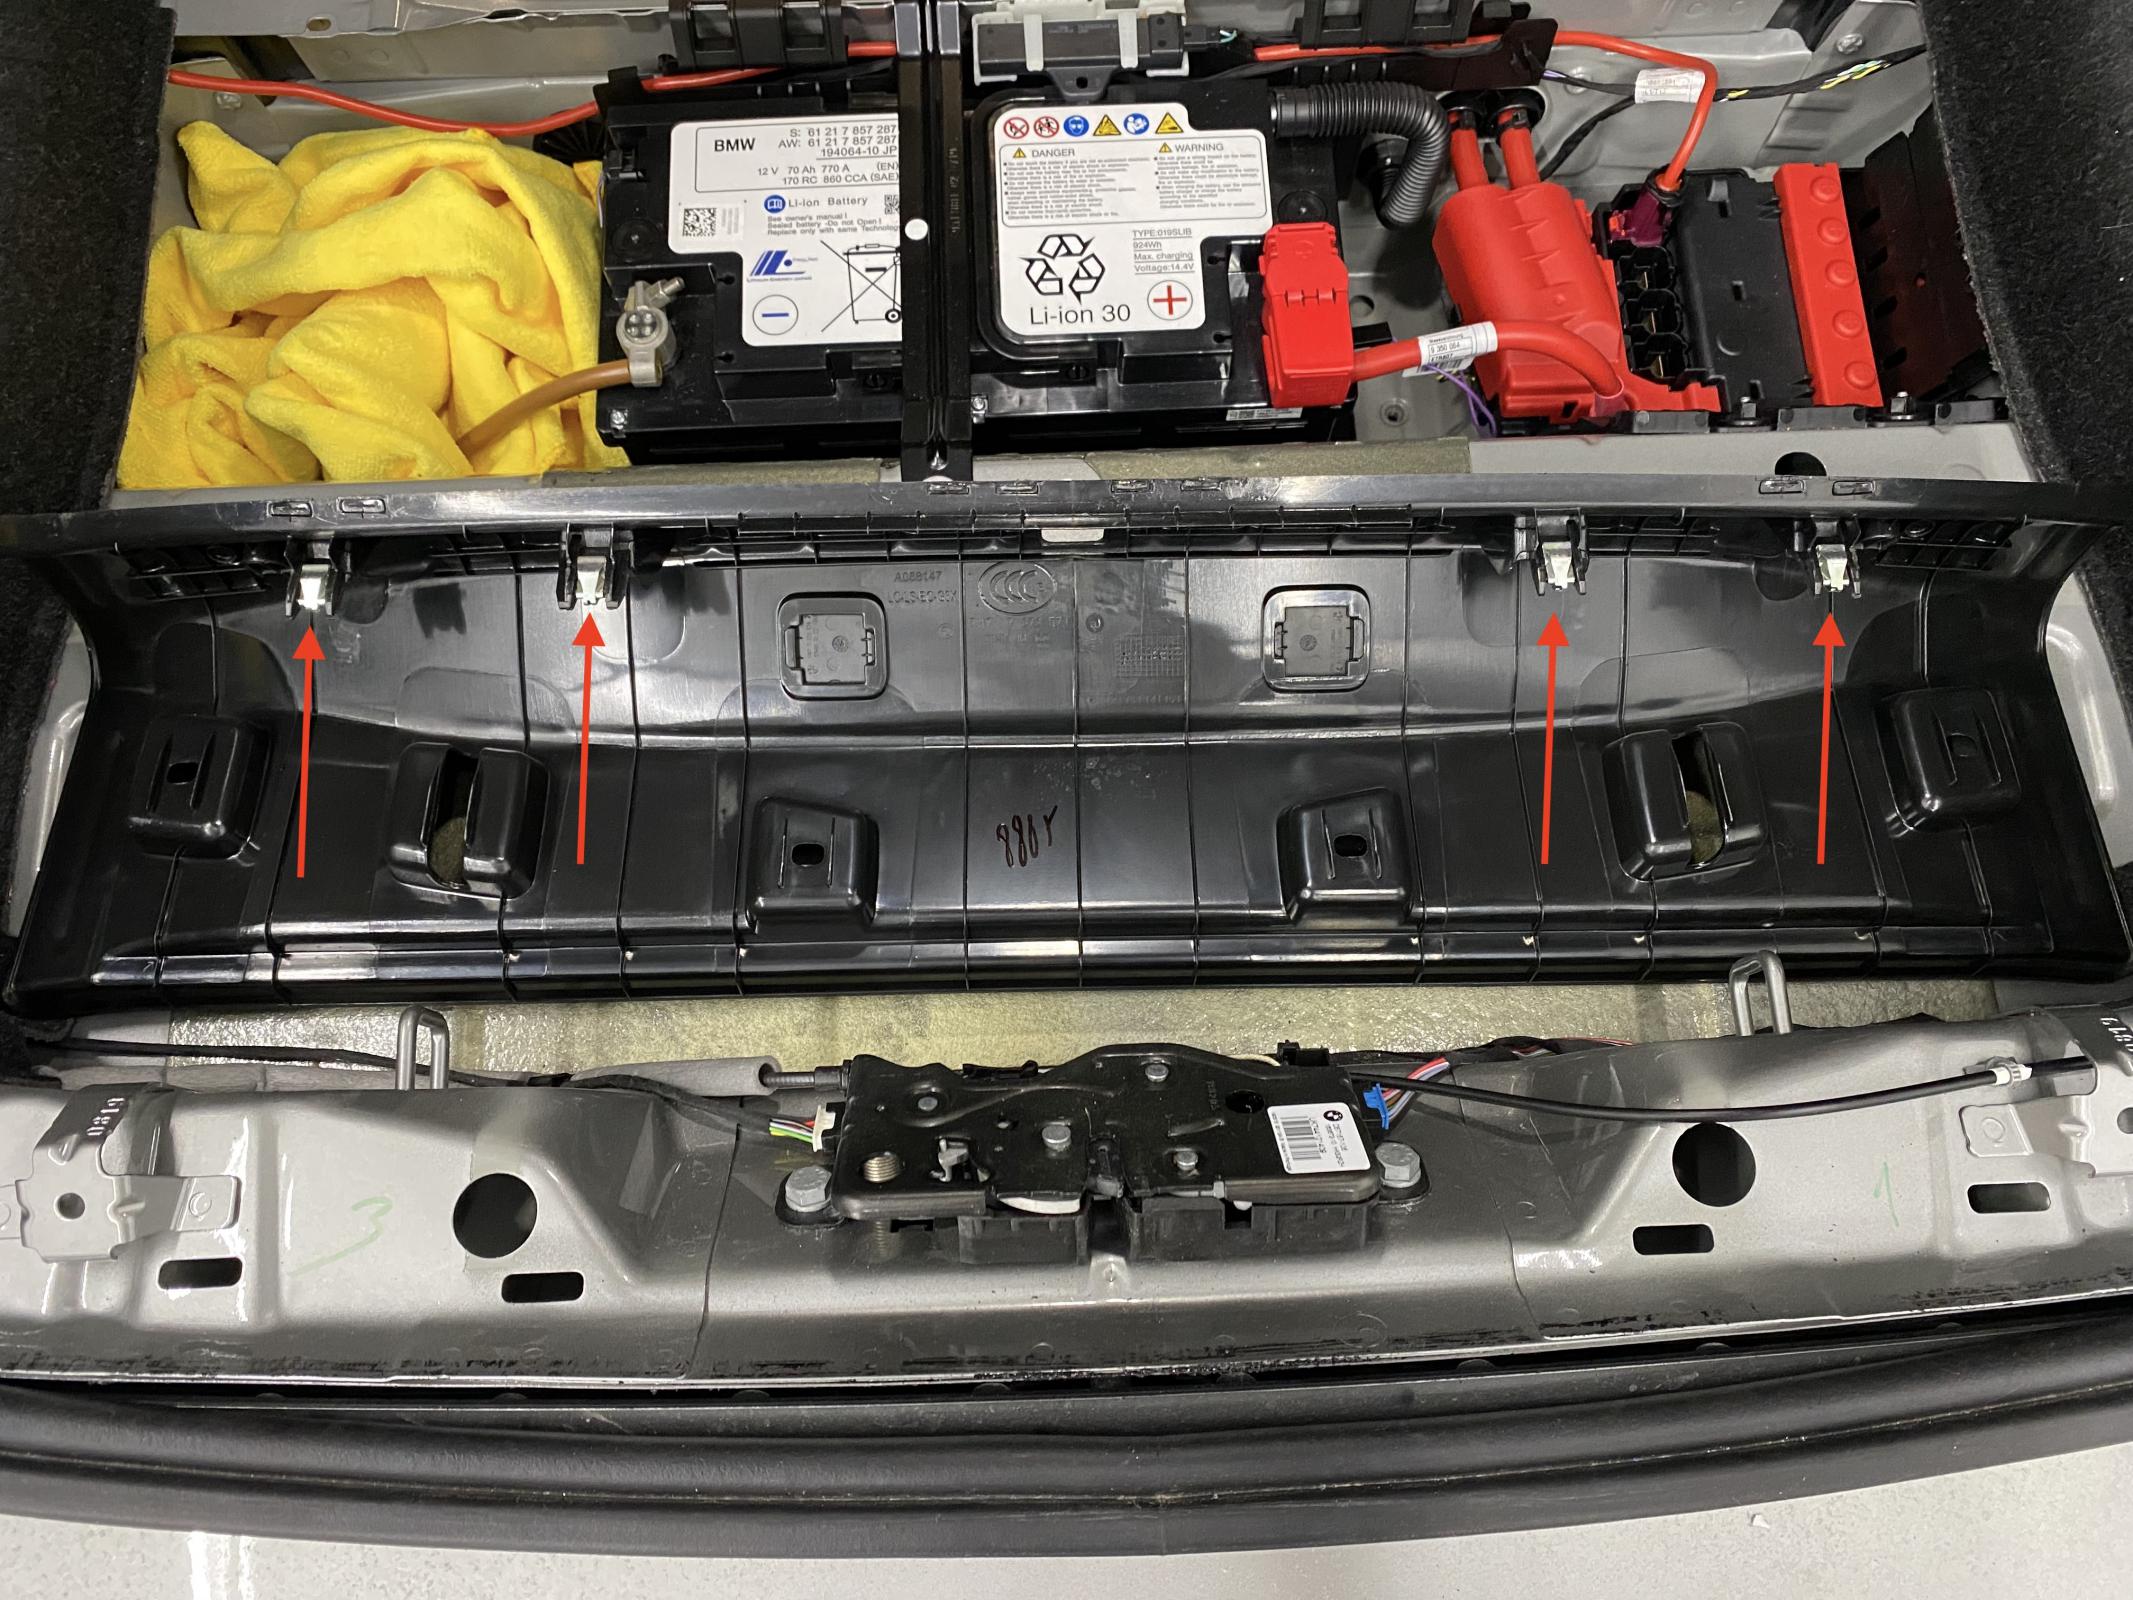
Remove the 2 hinge covers, they are held by 1 hidden clip, 1 visible Expanding rivet, and 2 locks:
Pull the Felt liner towards you, and then there will be 4 more hidden clips towards the edge of the trunk:

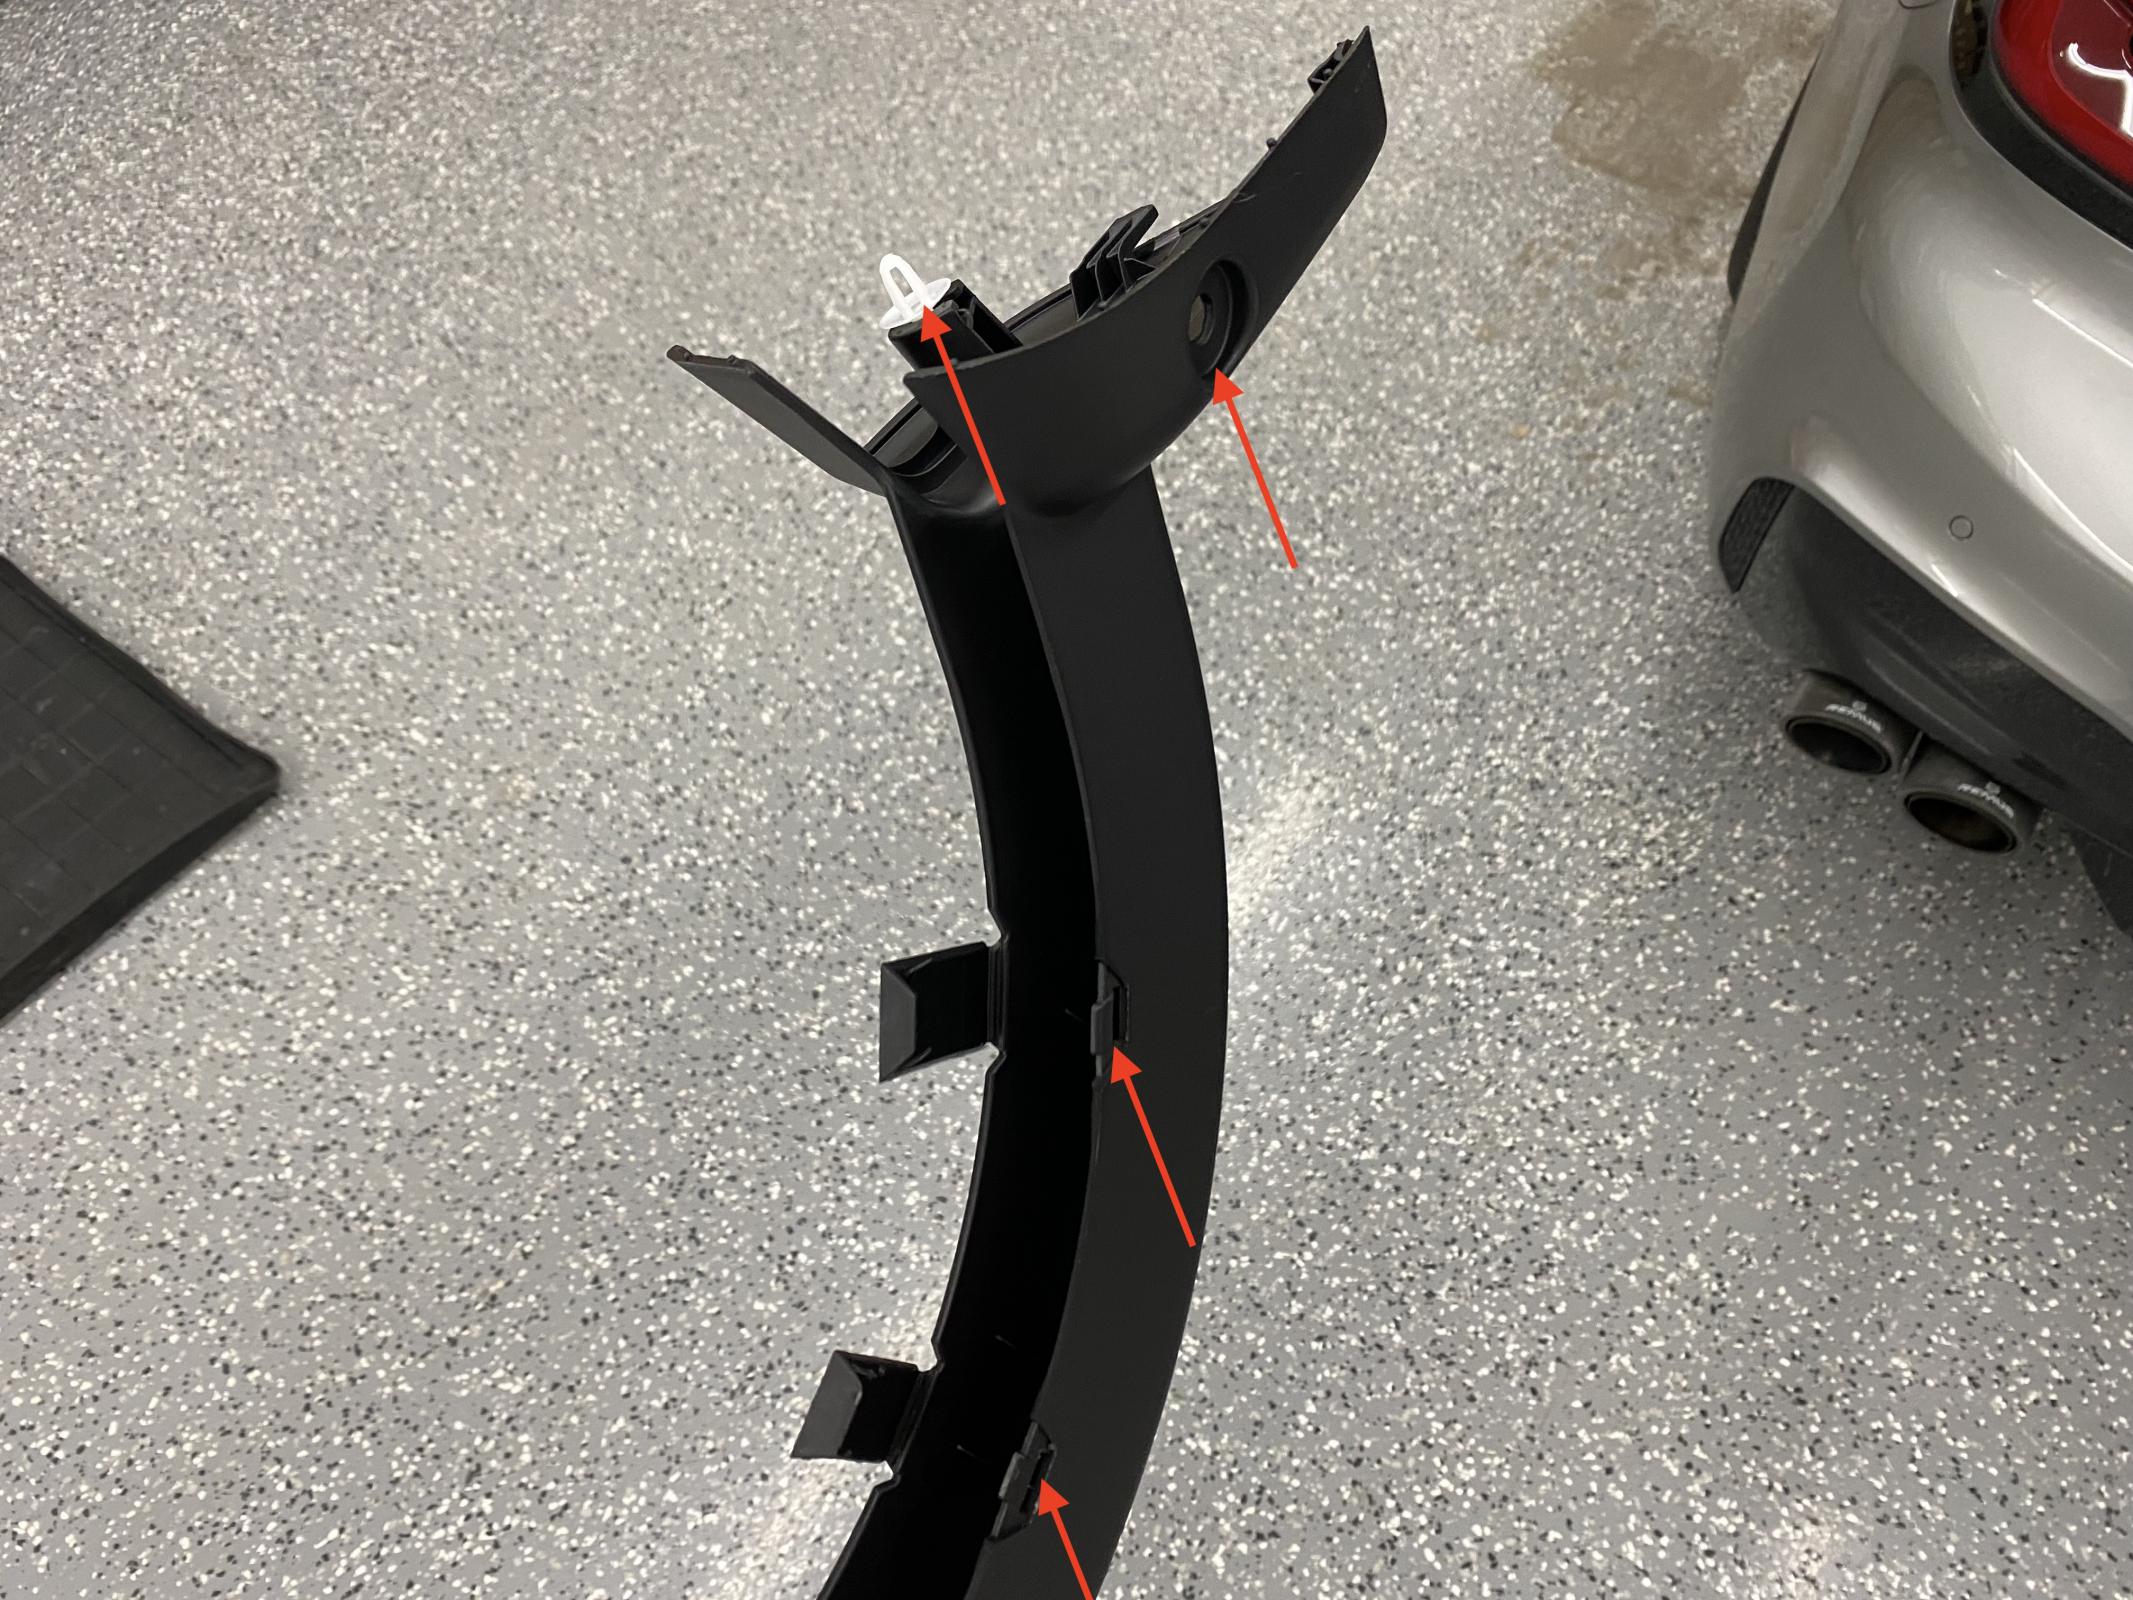
Remove the 2 covers on the side of the trunk (they cover the side of the lights. Start from the bottom, and work your way up to the clip:

Unplug the inner tail lights, and remove the 3 10mm Hex nuts on each. Carefully replace with LCI tail lights:
 Now we need to re-arrange the pins on the inner tail light connectors.
Unlock the clip on the side of the connector:

To release each one of the wires from the connector, insert the small screwdriver into the smaller hole to release the pin lock:
 Here is the way the connectors should look like:
Original Left connector:
Pin 1: Blue/red stripe
Pin2: Empty
Pin3: Brown
Pin4: Yellow/Black stripe
Pin5: Empty
Pin6: Yellow/Brown Stripe
Original Right connector:
Pin1: Blue/White stripe
Pin2: Empty
Pin3: Brown
Pin4: Yellow
Pin5: Empty
Pin6: Blue/Black Stripe
Re-arranged Left connector for LCI tail lights:
Pin 1: Empty
Pin2: Yellow/Brown Stripe
Pin3: Yellow/Black stripe
Pin4: Empty
Pin5: Blue/red stripe
Pin6: Brown
Re-arranged Right connector for LCI tail lights:
Pin1: Empty
Pin2: Blue/Black Stripe
Pin3: Yellow
Pin4: Empty
Pin5: Blue/White stripe
Pin6: Brown
Now let's get to the outer tail lights.
Pull back the weather stripping, and remove the drip rails on both sides. Start from the windshield and work your way down. The drip rails are held on 2 clips:

Lift up the carpet and remove from the car:

Remove 4 Expandable rivet clips from the Loading Sill cover:

Pull back the weather stripping around the Sill cover and lift it up. It has another 4 hidden metal clips holding it:
On each side of the trunk, remove 3 Expandable rivet clips:

On each side, release the round clip around the hinges and lift it up and away:


Now you can carefully move the trunk trim to the side on both sides, to get to the outer tail light 10mm Hex nut and the connector. Remove the nut and unplug the connector:

Remove 2 more 10mm Hex nuts on both outer tail lights:

Now you can install LCI outer tail lights instead, and secure them with the same 10mm Hex nuts.
On outer tail lights, you do not need to do any rearrangements of the pins. They are plug-and-play.
CODING:
I didn't do coding myself. I used Vick from fb.com/bimmercoder or
www.bimmercoder.com . His whatsup: +60 12-396 9654 I highly recommend him.
From my understanding nobody has reported on getting these USA red lights to work properly on USA cars before me. We spent hours and hours with different variations. My lights finally work 100% function wise, and no errors: Turn signals, brakes, running lights, hazards, LED reverse lights, all work.
What is
NOT working, are the Welcome Lights (the lights that go ON for the first 15 seconds when you unlock your car). Those i had to turn off in my iDrive settings, otherwise they can cause issues if you start your car before they go off.
Hopefully somebody will figure out the Welcome Lights, and I will update this guide. So far from what I've seen, installers/coders in USA are all struggling to get those to work.
Here are the final results:


Here is also a video of how they are functioning:
I hope this guide will be helpful to others! Please let me know if you have any questions.
Thank you.