|
12-29-2016, 05:03 PM
|
#1
|
|
BimmerPost Supporting Vendor

Drives: G82 M4 / G87 M2
Join Date: Oct 2006
Location: Chicago
|
RKP F87 M2 Front Lip Install Guide
Tools required:
-8mm socket
-4mm Hex/Allen key socket
-Masking tape
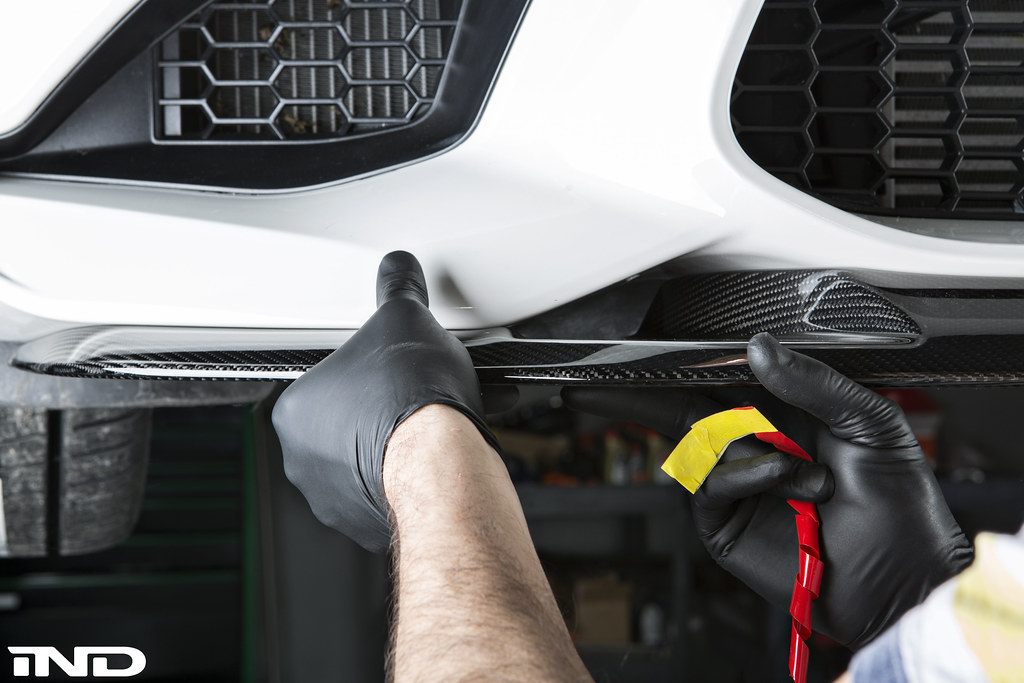
Step 1:
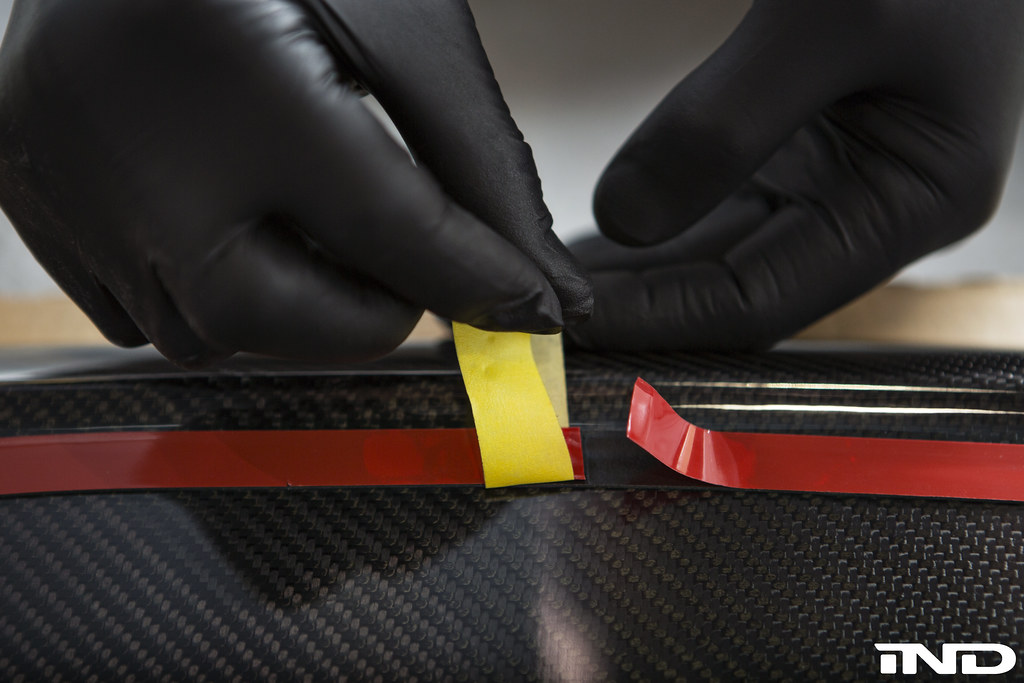
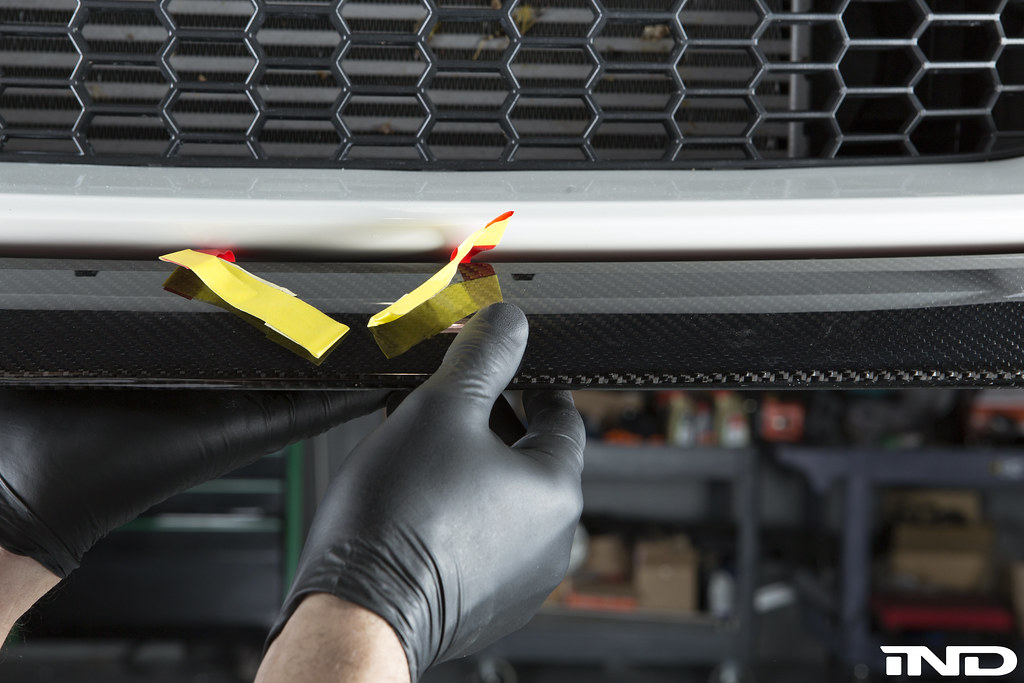
Prep the tape on the lip and reinforcement plate. On each end pull off a 1 inch section of the backing paper and apply masking tape to the ends. This will help you grip the 3M tape backing when you go to install it to the bumper.

 Step 2:
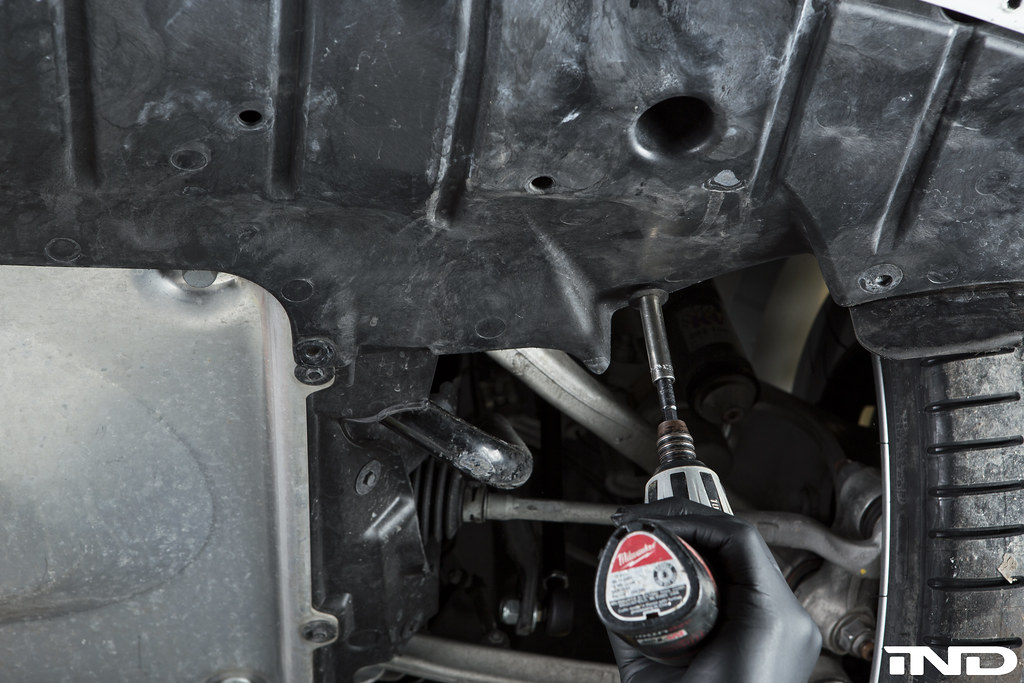
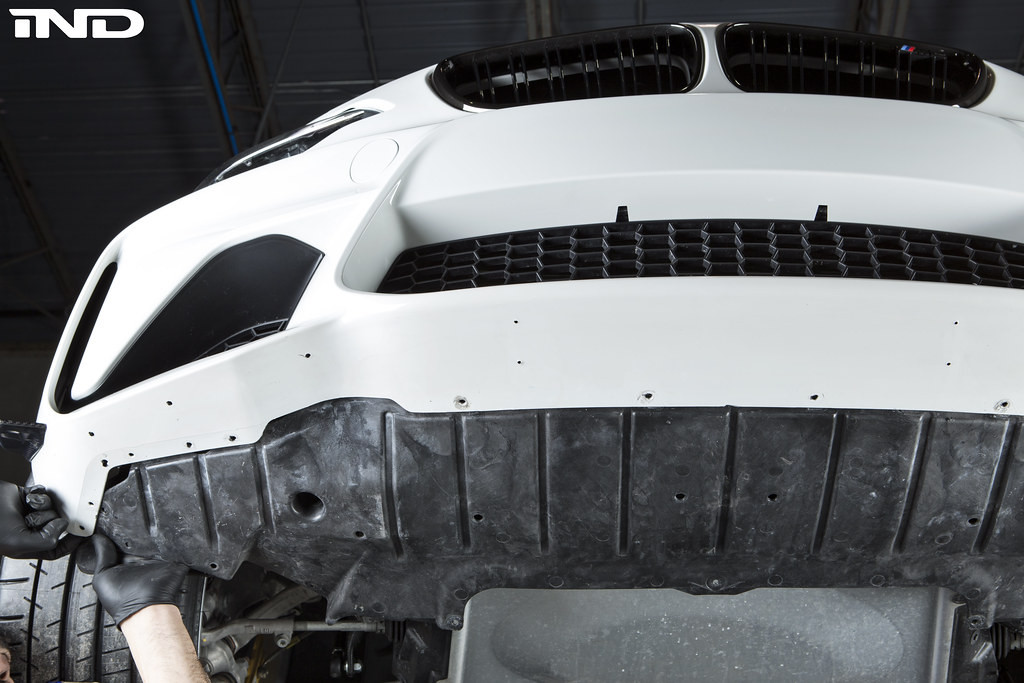
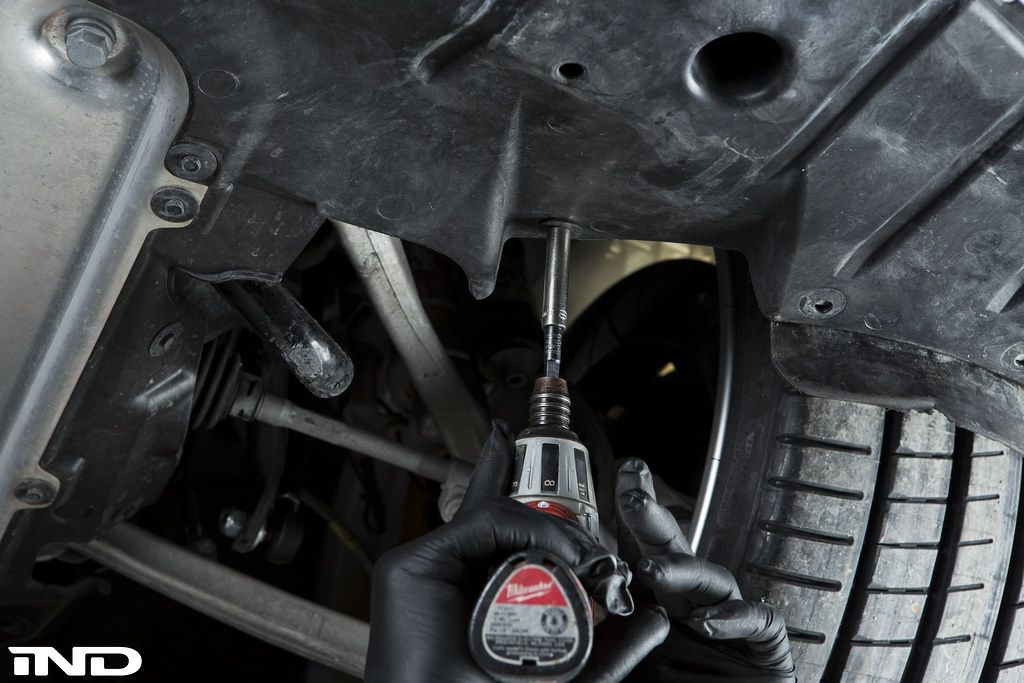
Remove all 8mm bolts holding the stock under tray to the vehicle.
 Step 3:
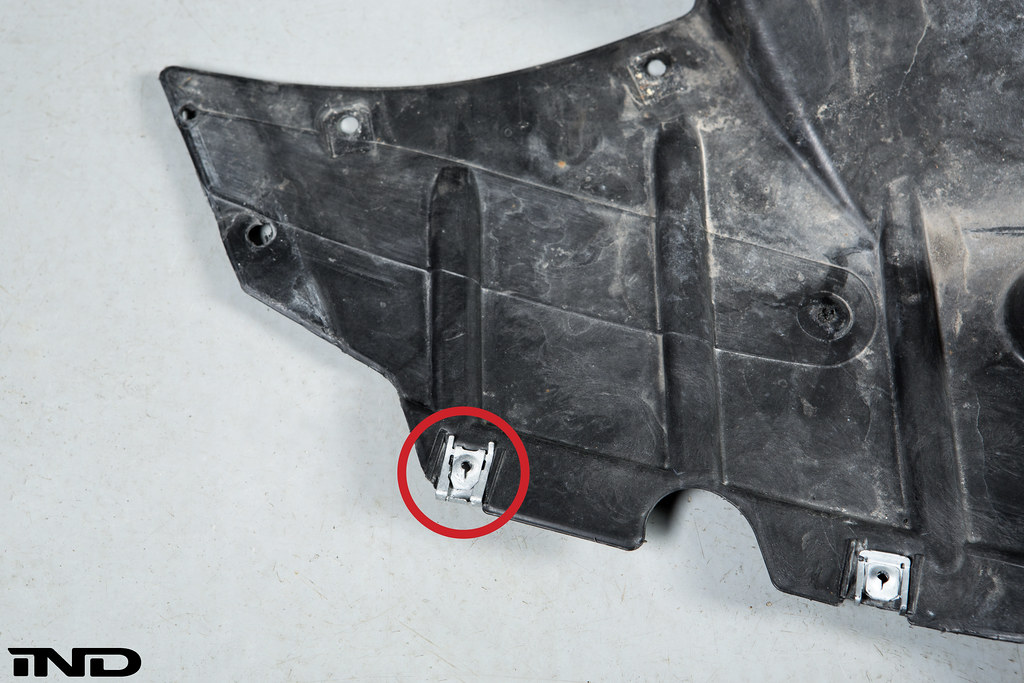
Remove all the u-clip nuts from the under tray.
 Step 4:
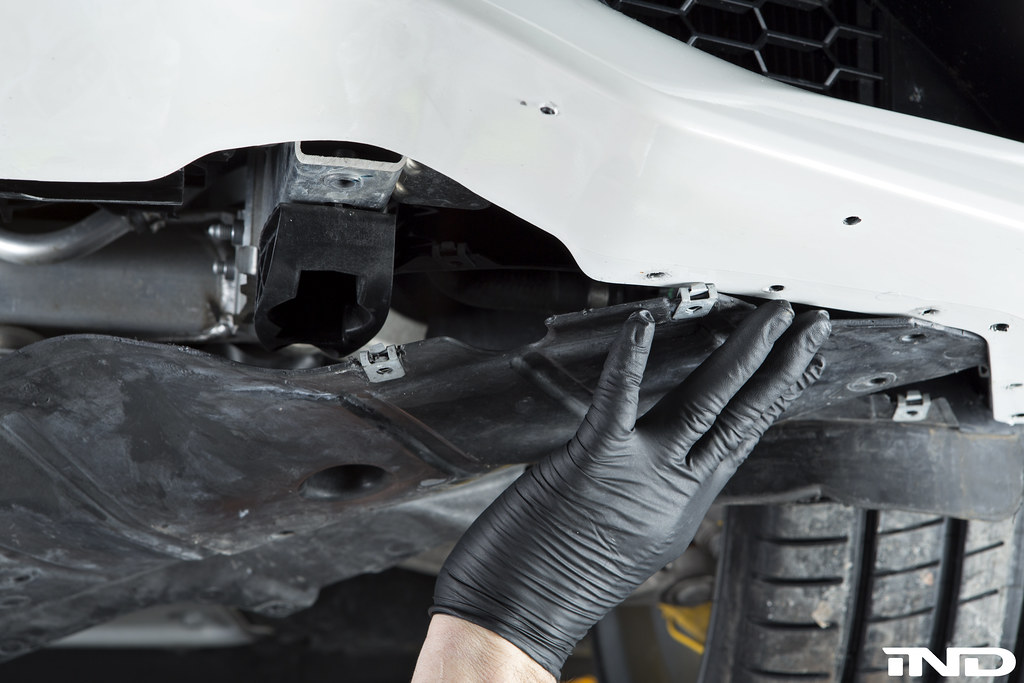
After installing the reinforcement plate between the front bumper and the oil cooler, slip the front undertray in between the bumper and the reinforcement plate.

 Step 5:
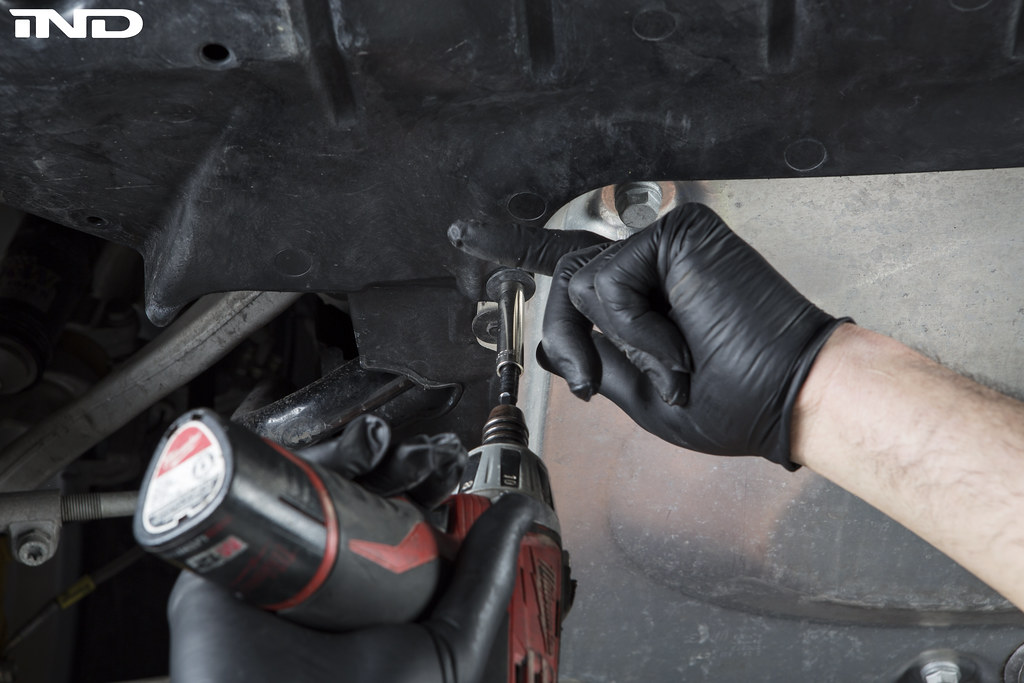
Secure the back of the undertray to the vehicle using the OEM hardware.
 Step 6:
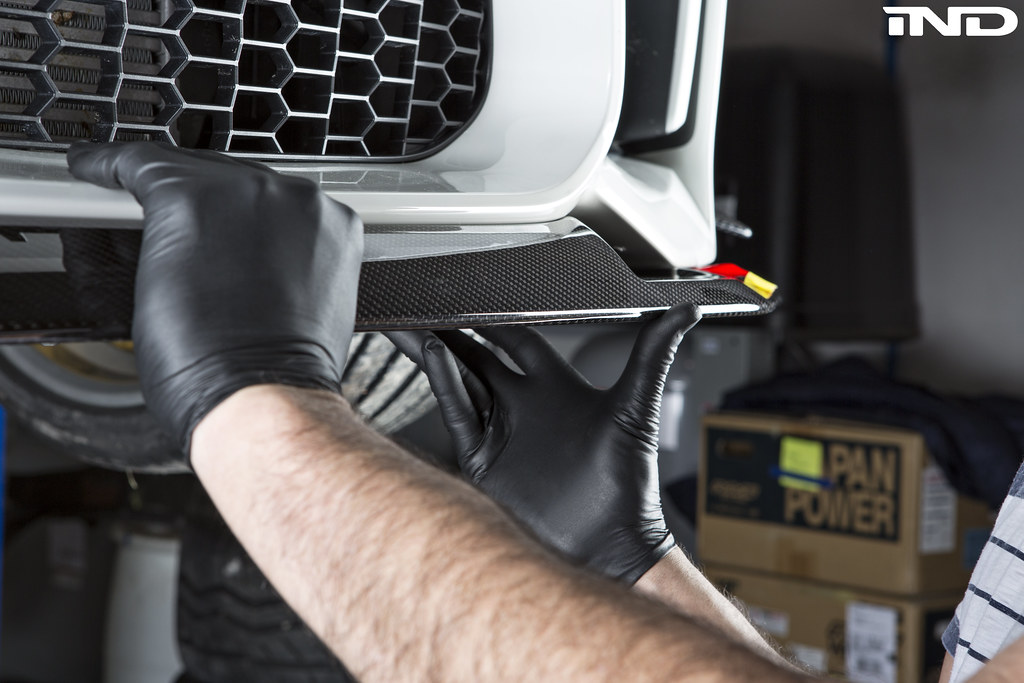
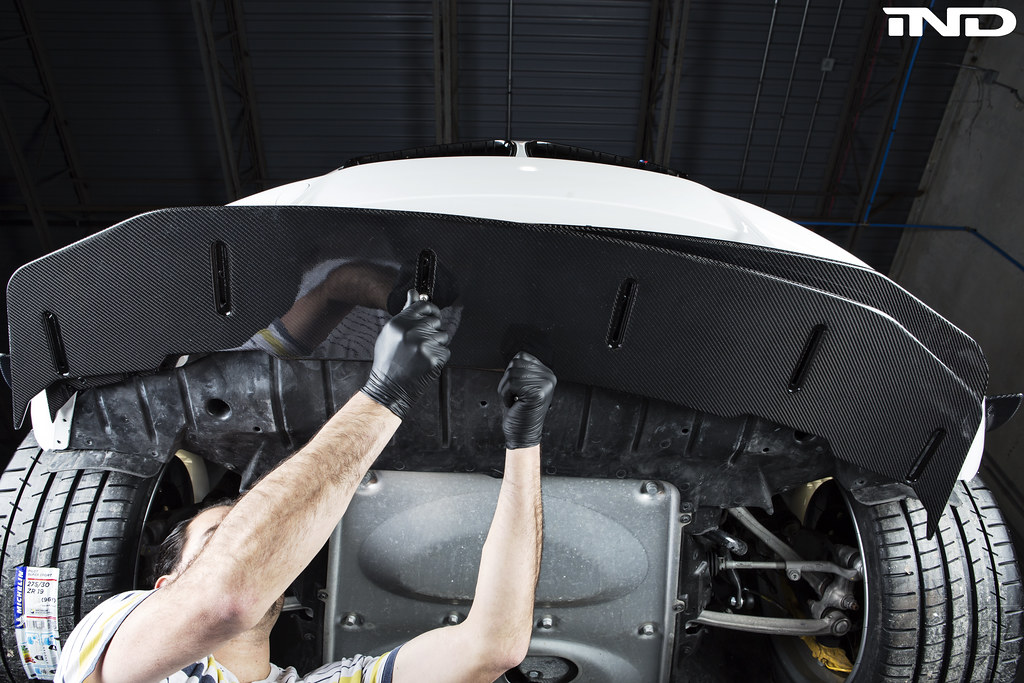
Once the undertray is positioned properly, place the included screws through the 4 holes in the center of the upper carbon fiber lip and up through the bumper until they tap into the reinforcement plate. Leave roughly an inch of gap between the lip and the bottom of the bumper to allow for proper positioning before adhering the double sided adhesive to the bumper.

 Step 7:
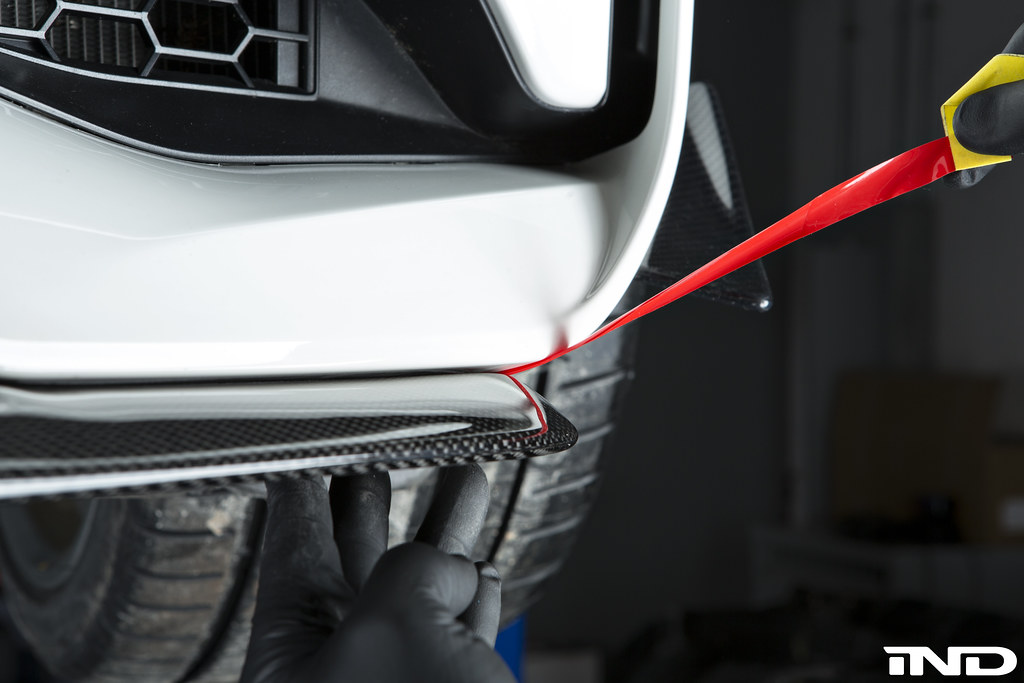
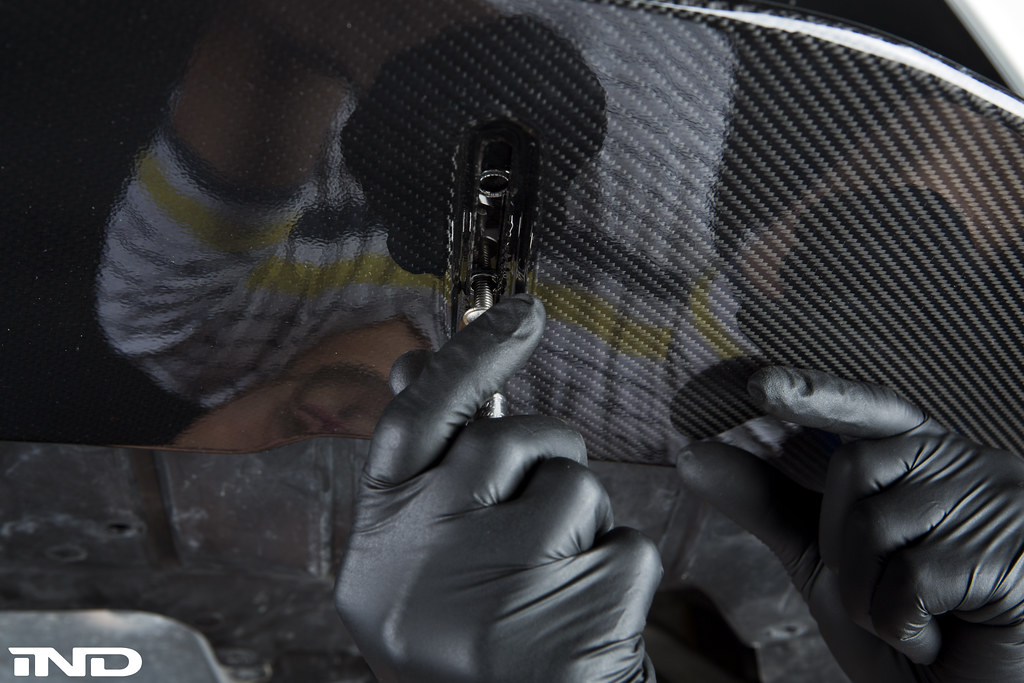
With the lip positioned, start peeling the backing off the double sided adhesive as shown and applying pressure to partially adhere it to the bumper.
 Step 8:
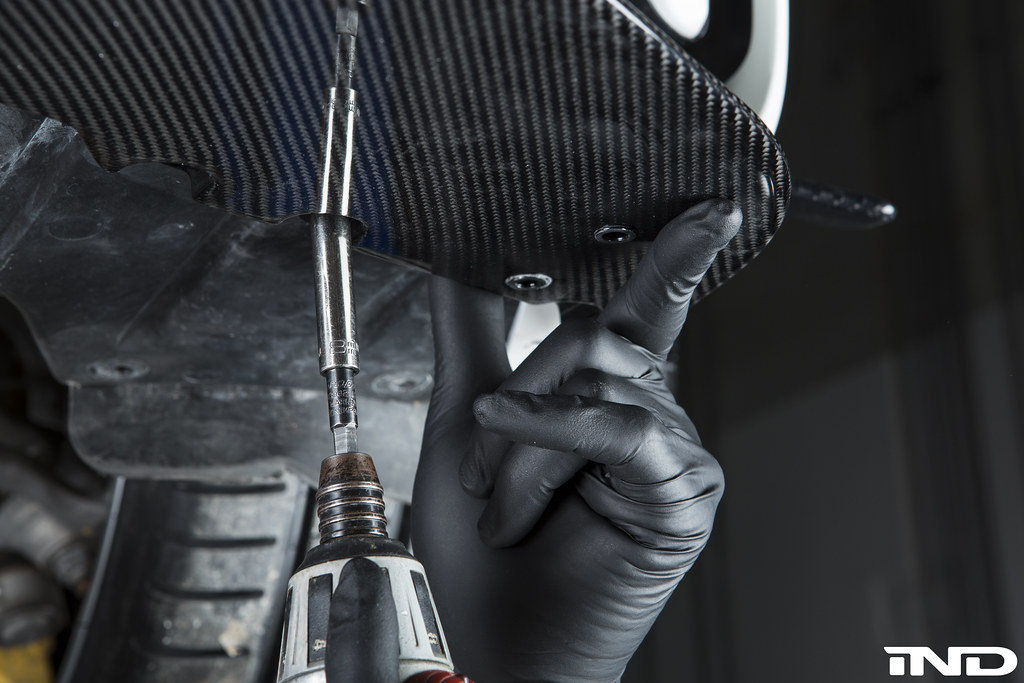
With the lip partially attached to the bumper, you can now start threading the six screws (three per side) into the U-clip nuts attached to the under tray.
 Step 9:
With all the screws properly aligned, fully remove the double sided tape from the top of the lip and press the lip onto the underside of the bumper.
 Step 10:
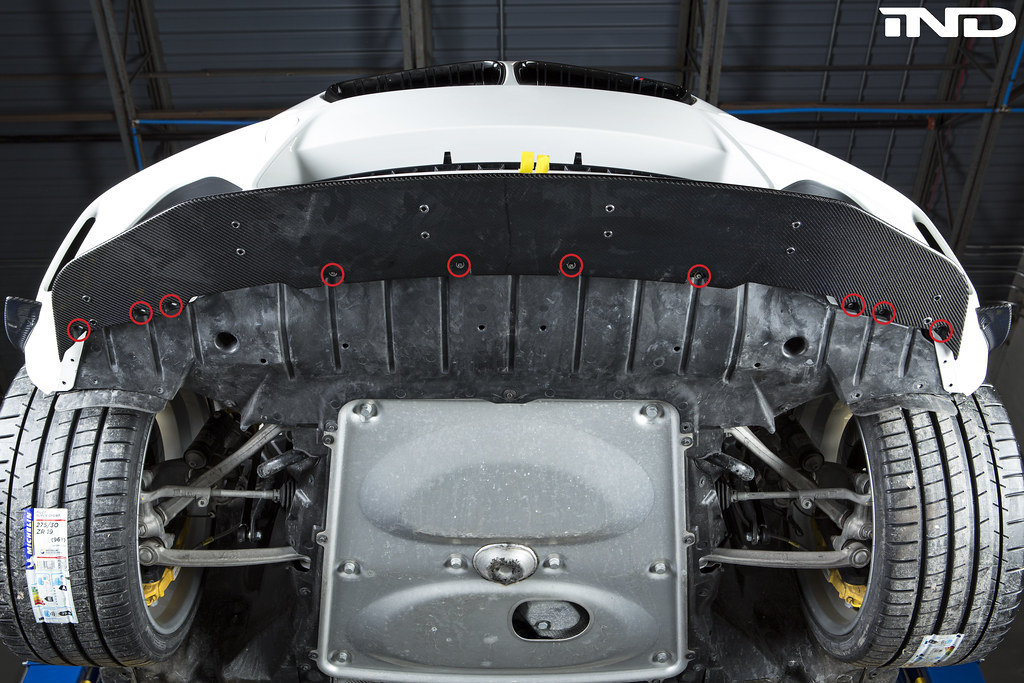
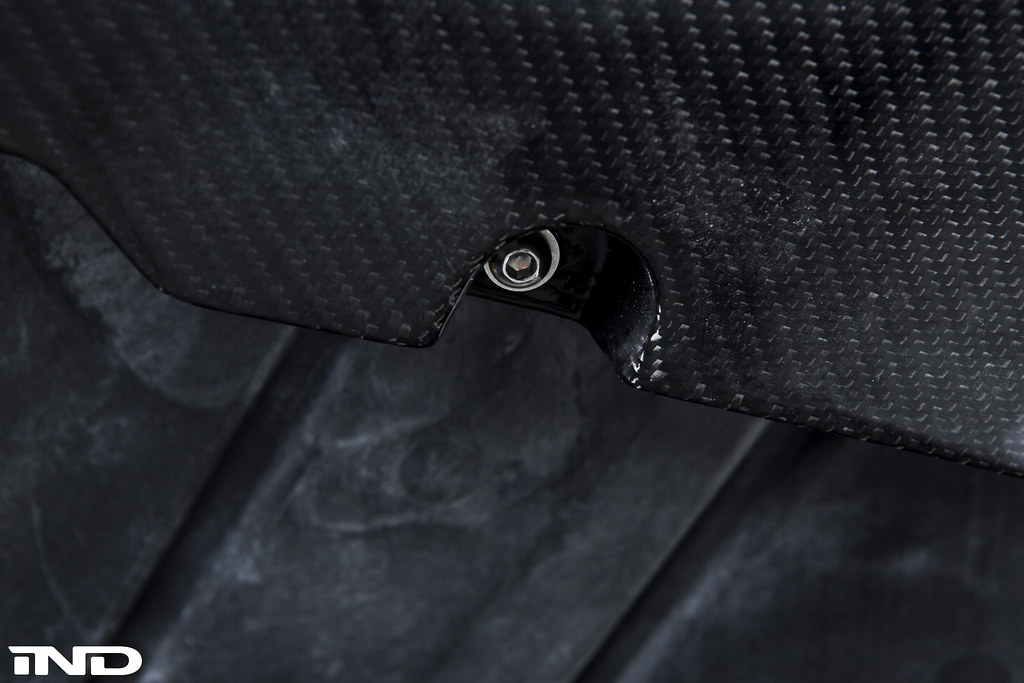
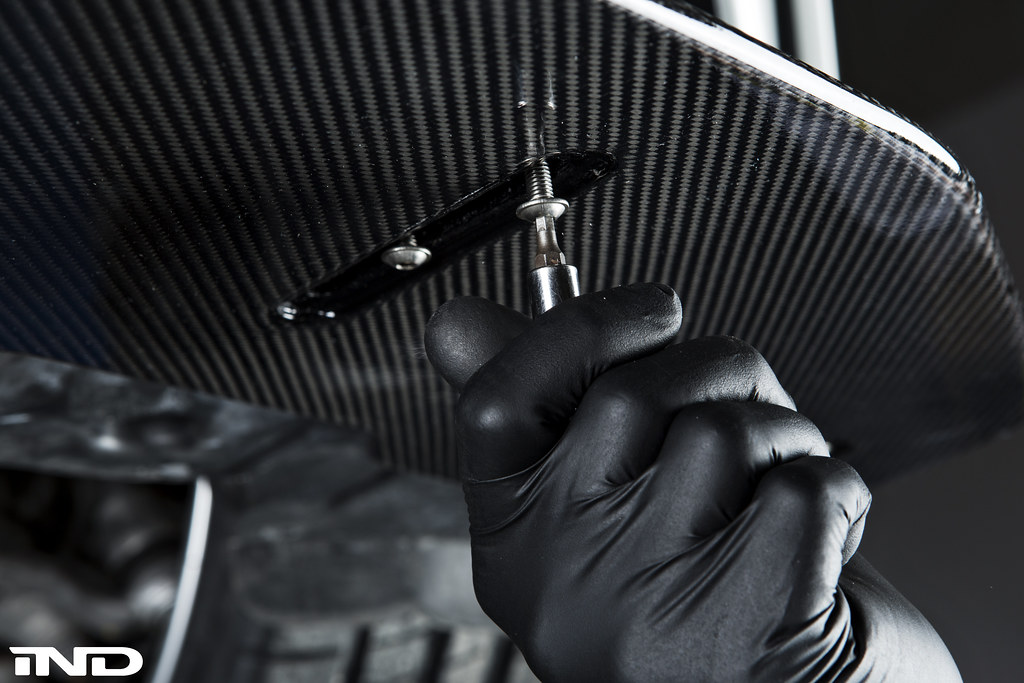
Once the lip is fully adhered to the bumper, tighten all ten screws.
 Step 11:
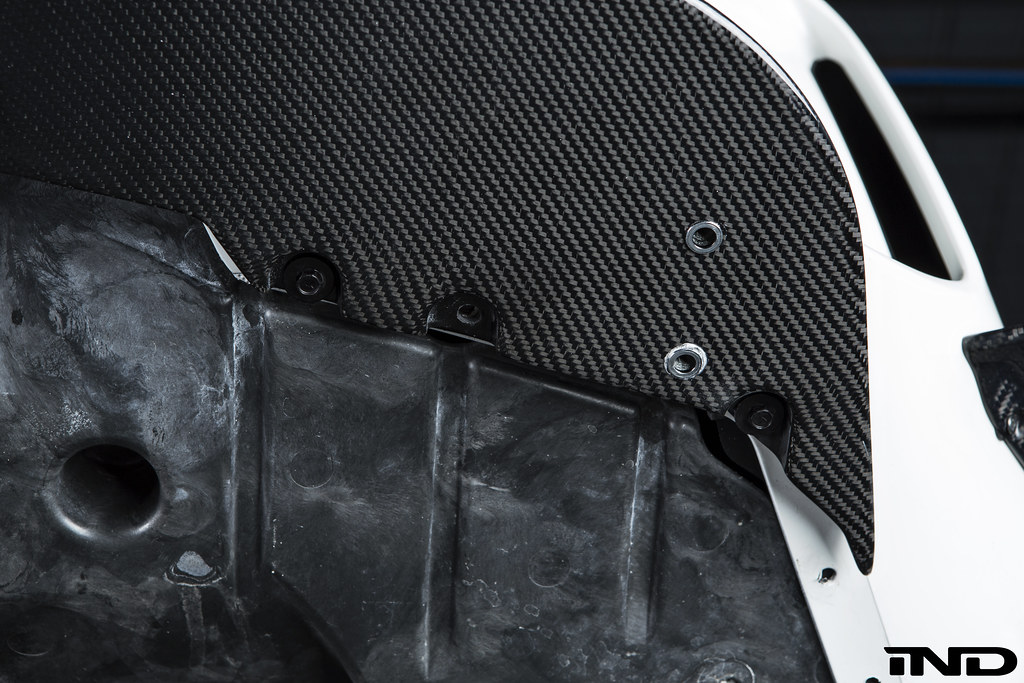
With the lip attached, the lower splitter can now be mounted.
Line the slide holes up with the corresponding nuts on the underside of the upper lip, and begin to thread the included screws into the splitter.
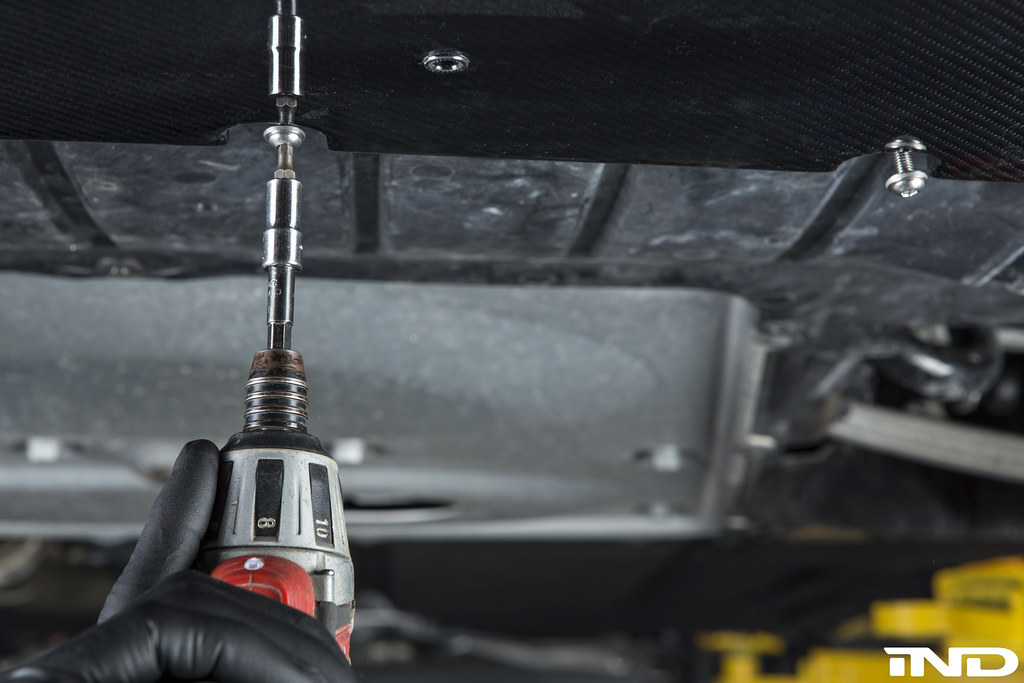
 Step 12:
With the splitter positioned to your desired setting, you can now tighten the twelve mounting bolts into the upper lip.

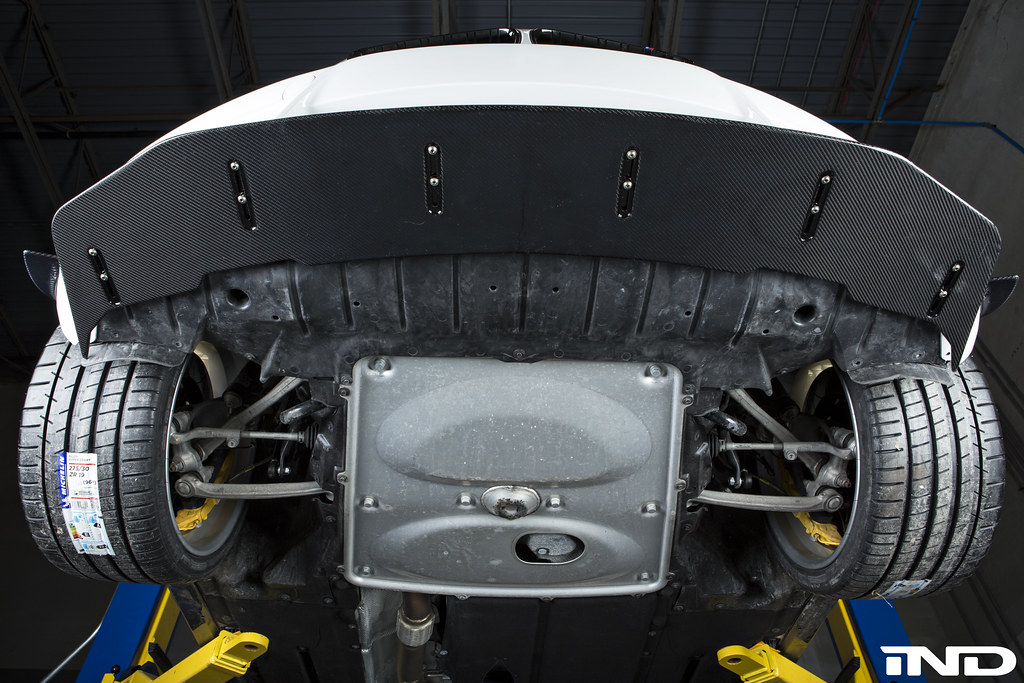
This completes the installation of the RKP F87 M2 Front Lip.
NOTE: When adjusting the position of the lower splitter after installation, be sure to loosen the mounting bolts enough so that the splitter is not in contact with the upper lip during adjustment. Dragging the lower splitter against the upper lip can cause scratching and damage on the visible surface of the lower splitter.
|
|
|
|